How to Set up Stadia Map Styles in WordPress using the Mapster WP Maps Plugin
Free
Starter
Standard
Professional
This tutorial will walk you through the process of installing the Mapster WP Maps plugin and applying a custom style JSON from Stadia Maps for use on your WordPress website.
Getting a Stadia Maps Account
Before getting started, you will need to sign up for a Stadia Maps account.
You will then need to add your WordPress domain to your account in the client dashboard. You can find out more about how we authenticate requests in the Authentication & Limits documentation.
Install the Mapster WP Maps Plugin
To get started, you will need to download and install the latest version of Mapster WP Maps from the WordPress website or install it via your plugin manager.
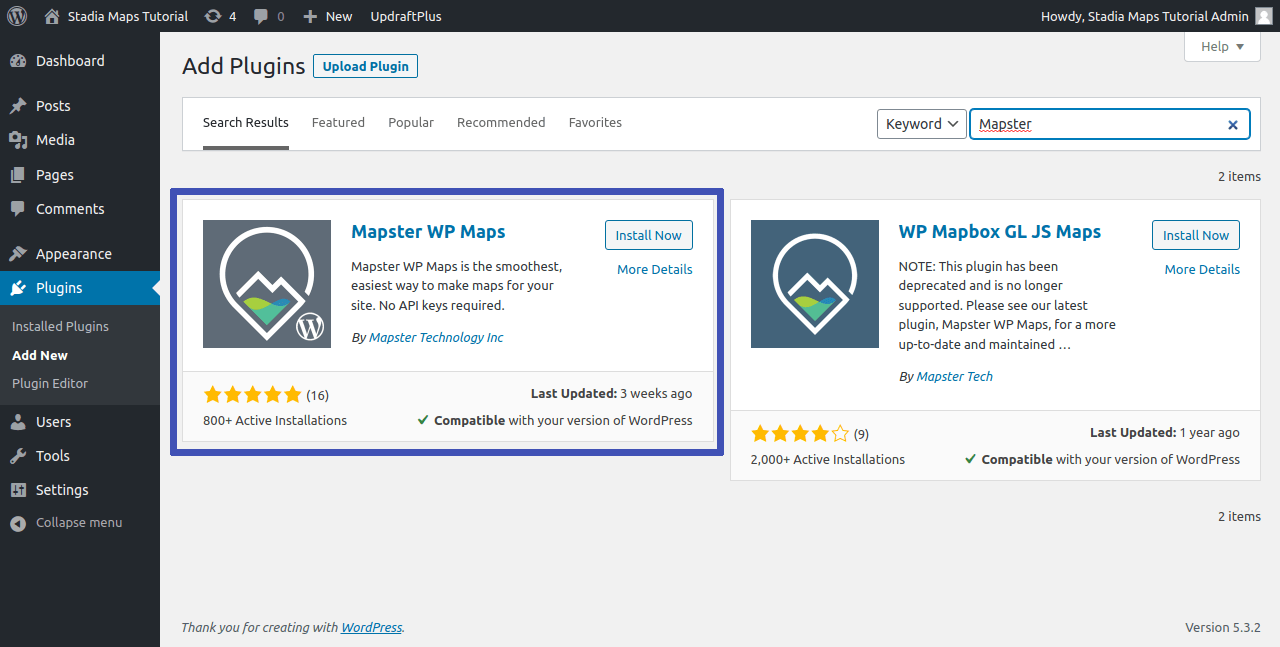
After installation, make sure to activate the plugin.
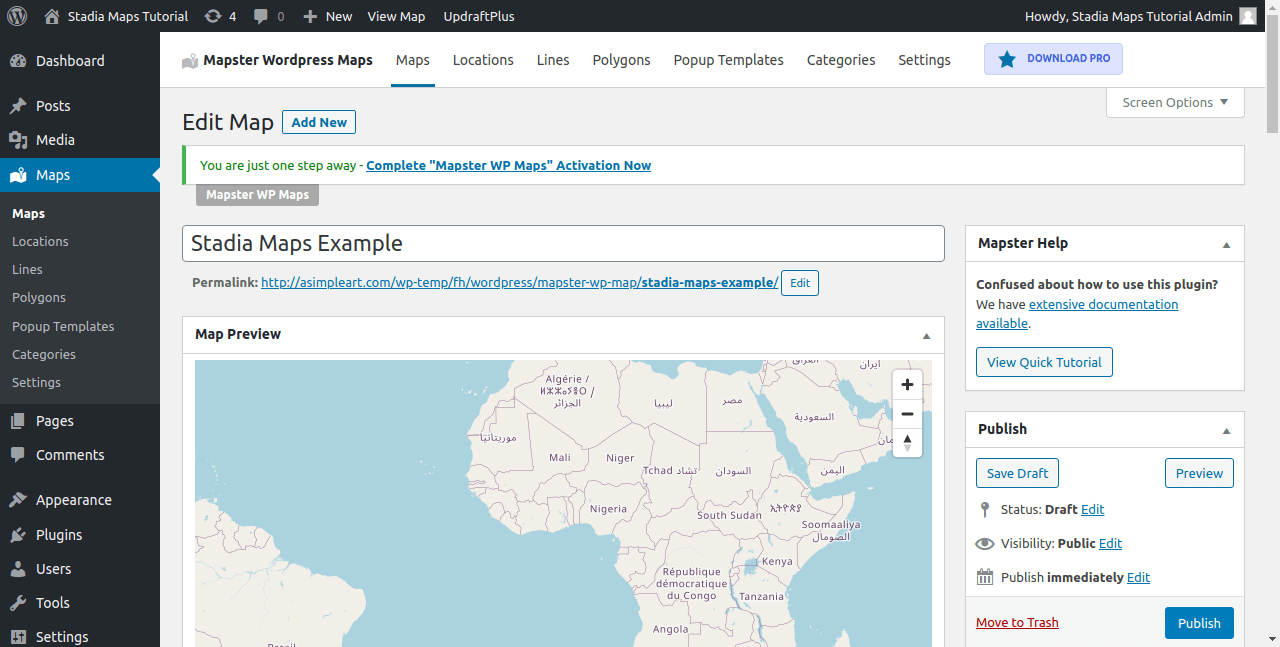
Create Your First Map
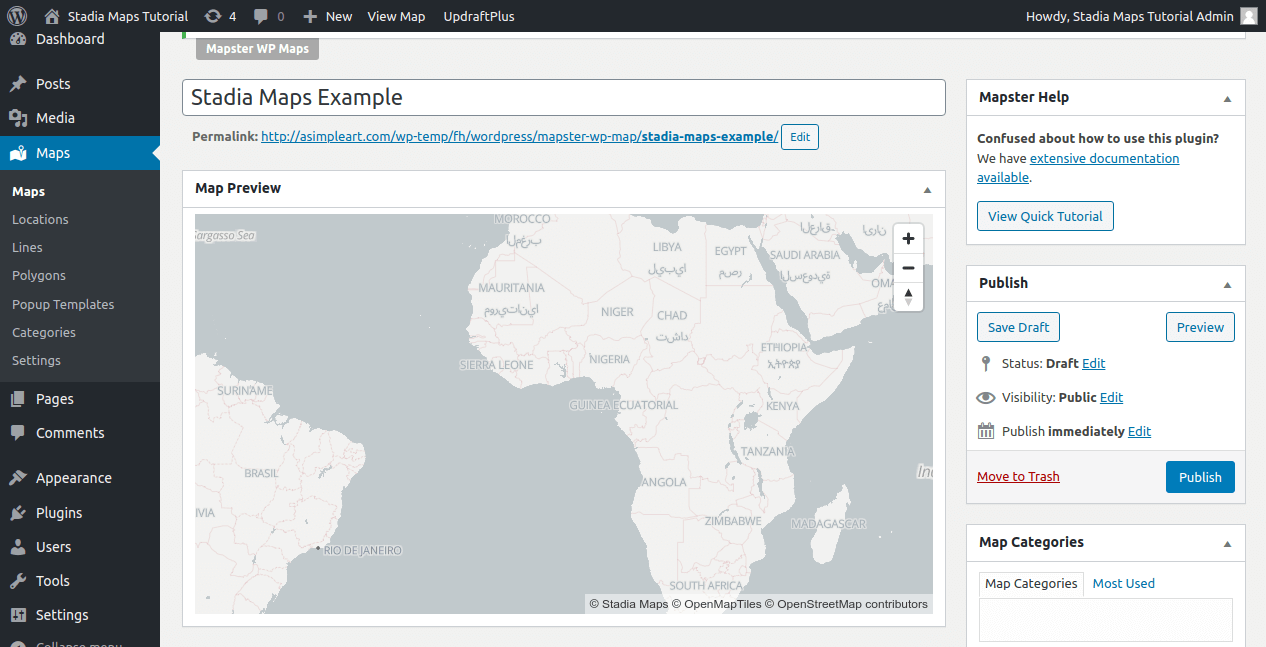
With the Mapster WP Maps plugin installed and activated, we can now create our first map.
-
Click on Maps from the menu bar, click the Add New button, and give your map a title
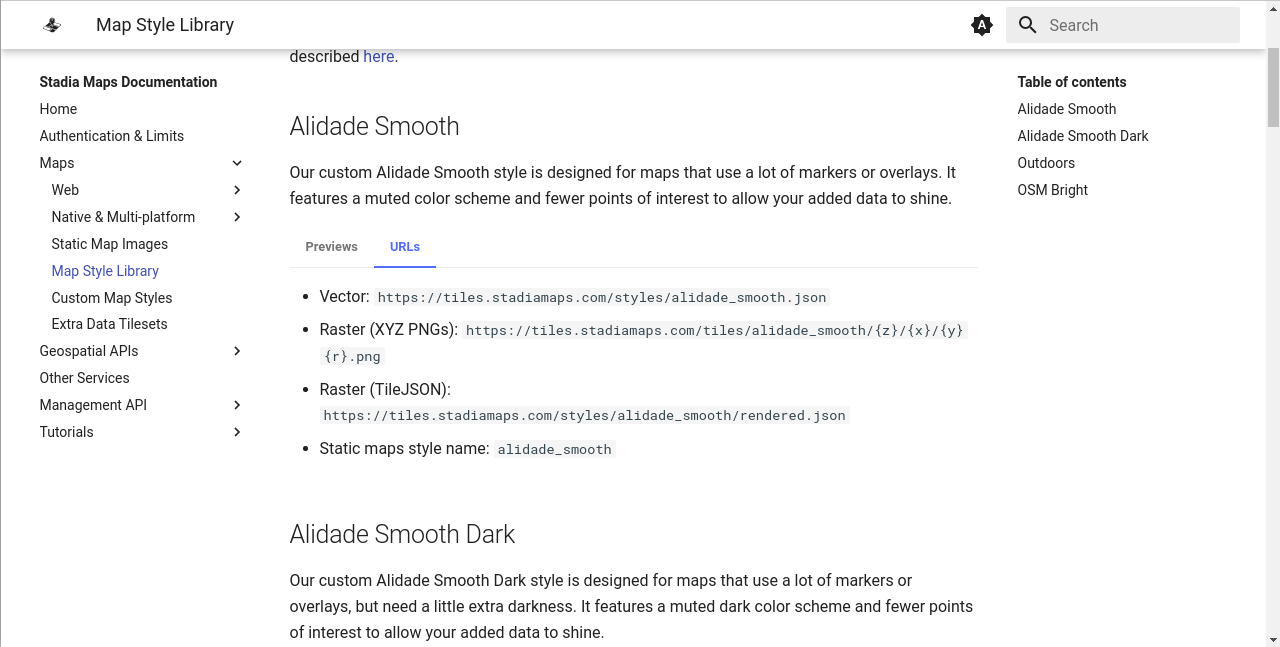
Select and Copy the Stadia Maps Style JSON
With our map created, we can now turn to selecting the style. For this, we need to paste a MapLibre JSON style into the plugin.
- Open up a browser new tab and navigate to Stadia Maps' documentation section for Map Style Libraries
- Find the map style you would like to use and click on the URLs tab (In our example, we will be using the Alidade Smooth style)
-
Locate the Vector URL, highlight it, right-click and select Go to http://… or Open Link and a new tab will open with the contents of the JSON file
-
Highlight the contents (
CTRL+A/CMD+A), right-click, and select copy
Tip
You aren't limited to using our styles! If you want to customize the colors or other elements of the look and feel of your map, read our guide on custom styles. When you've decided on styling you like, copy your style JSON before following the remaining steps.
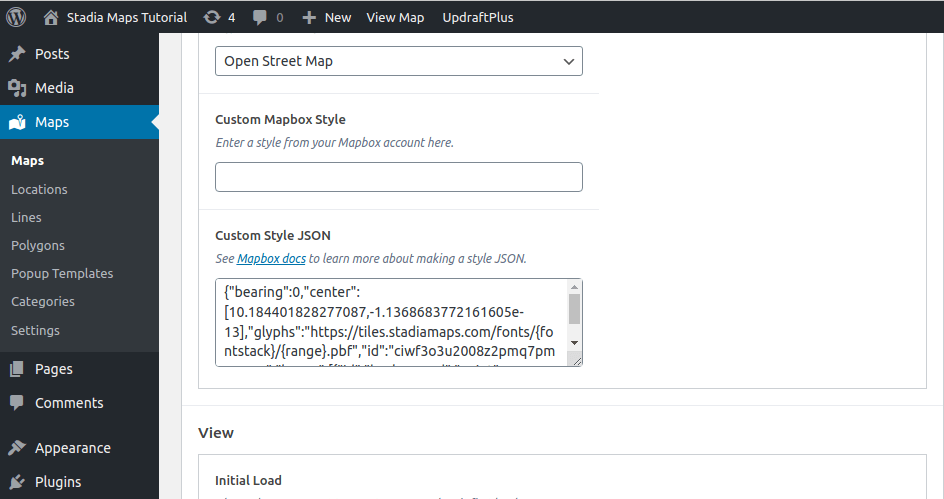
Update Your Map to Use the Custom Style JSON from Stadia Maps
With our JSON copied, we are now ready to update the Custom Style JSON for our map.
-
Return to your Mapster WP Maps plugin tab and scroll down to the Map Setup area, under Map Type, you will see a section labeled Custom Style JSON. Right click and select paste. The style JSON file contents should now be inside the Custom Style JSON text box.
-
Click off / defocus the Custom Style JSON text box and the map preview will reload using the Stadia Maps style JSON that you chose previously
Congratulations! You have now successfully updated your Mapster WP Maps to use a Stadia Maps Style.