Turn your Maps into a 3D Globe
Free
Starter
Standard
Professional
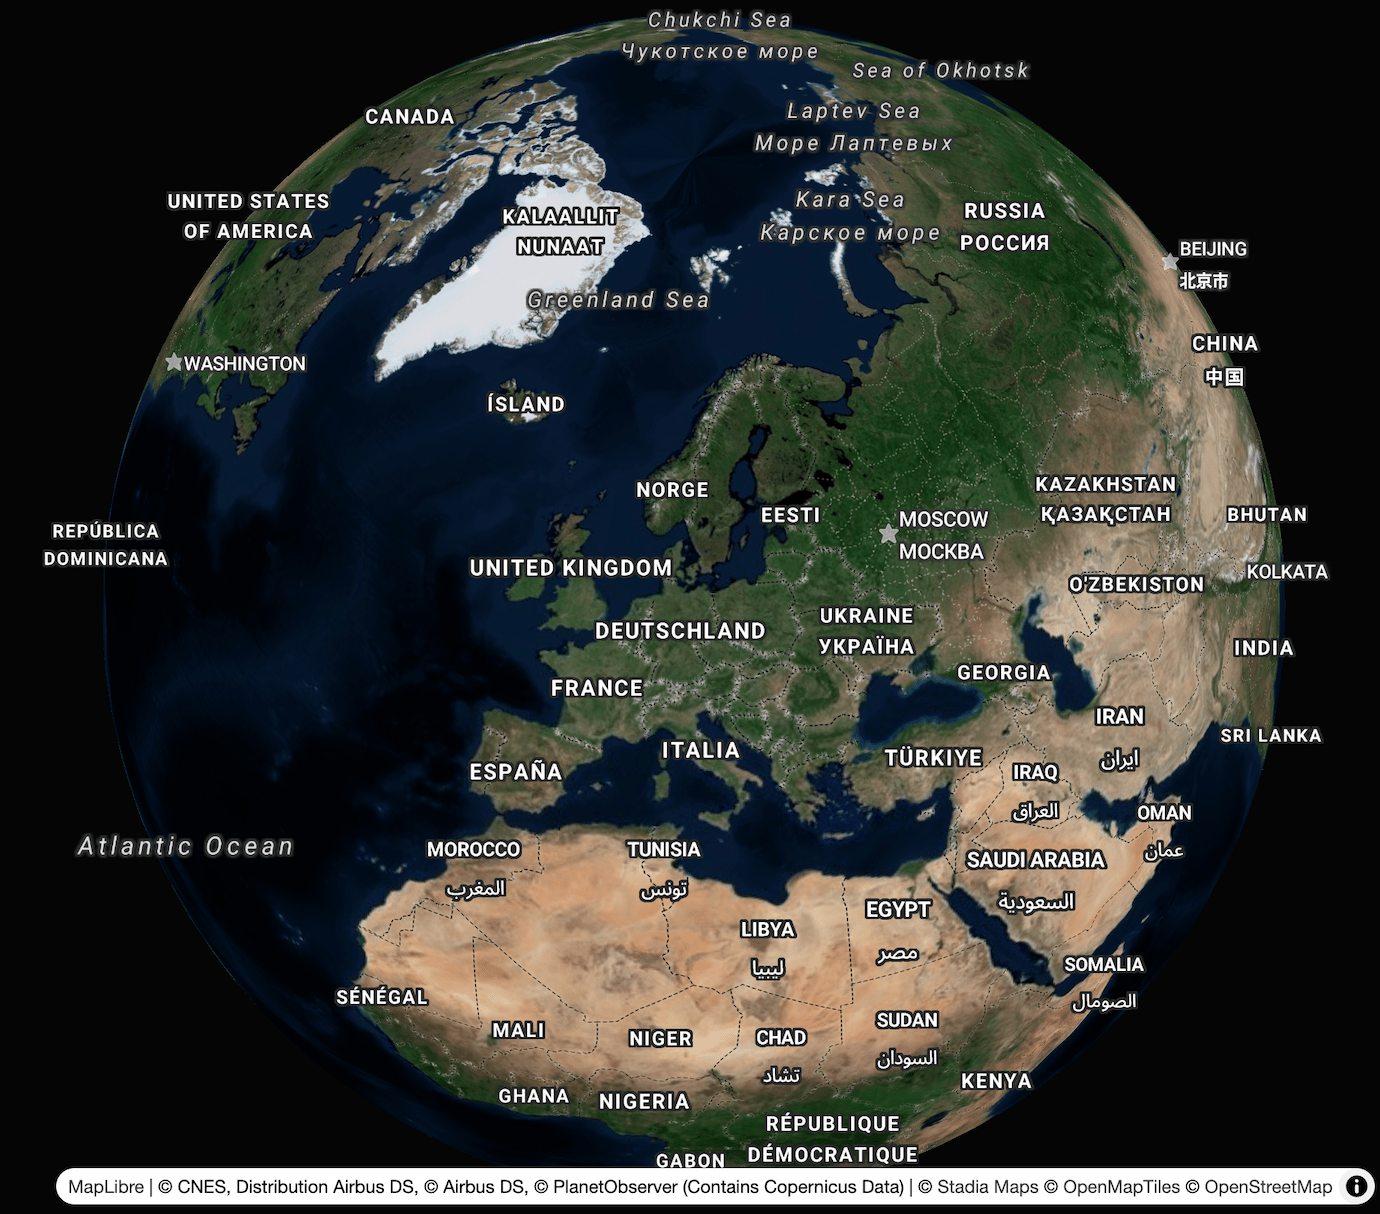
Most maps on the web are flat, but it doesn't have to be this way! Whether you're trying to avoid the distortions of the Mercator projection or just trying to make your map stand out, a globe view will do the trick. And it only takes a few lines of code!
This tutorial will show you how to activate the new globe projection in your maps using MapLibre GL JS. If you don't have a map set up yet and need some help getting started, check out our other web tutorials to fill in the gaps.
For local development on a web server at localhost or 127.0.0.1,
you can get started without any API keys or domain setup!
For mobile, backend, and non-local web development, you'll need either domain auth or an API key. If you don't already have a Stadia Maps account, sign up for a free to get started.
Domain-based authentication
Domain-based authentication is the easiest form of authentication for production web apps. No additional application code is required, and you don't need to worry about anyone scraping your API keys. We recommend this for most browser-based applications.
- Sign in to the client dashboard.
- Click "Manage Properties."
- Under "Authentication Configuration," click the button to add your domain.
API key authentication
Authenticating requests via API key
You can authenticate your requests by adding an API key to the query string or HTTP header.
https://api.stadiamaps.com/tz/lookup/v1?lat=59.43696&lng=24.75357&api_key=YOUR-API-KEY
Authorization: Stadia-Auth YOUR-API-KEY
The simplest is to add a query string parameter api_key=YOUR-API-KEY to your request URL.
For example, to access the /tz/lookup API endpoint, your request URL might look like this.
You can also use an Authorization HTTP header instead of a query string
as shown below.
Don't forget the Stadia-Auth prefix!
How to get an API key
Don't have an API key yet? Follow these easy steps!
- Sign in to the client dashboard. (If you don't have an account yet, sign up for free; no credit card required!)
- Click "Manage Properties."
- If you have more than one property (ex: for several websites or apps), make sure you have selected the correct property from the dropdown at the top of the page.
- Under "Authentication Configuration," you can generate, view or revoke your API key.
Video: How to generate your API key
Upgrade MapLibre to v5 or higher
MapLibre GL JS added support for globe rendering in version 5.
So the first step is make sure your project is using the latest release
(e.g. by upgrading package.json or updating your <script> tag).
Configure the map projection
To activate the globe view, set the projection once the style loads.
map.on('style.load', () => {
    map.setProjection({
        type: 'globe',
    });
});
Note
If you call setProjection before the style loads, you'll get an error.
If you have a custom map style and want it to always to always load in the globe projection,
you can set the projection property directly in your style.
See the style spec for details.
If you'd prefer to give users a choice between modes, you can also add a globe control to your map like this:
map.addControl(new GlobeControl());
Recommended: Configure the sky
The map will now work as-is, but it might look a bit odd with the default background settings.
To achieve a more realistic effect and better legibility,
set the background of your map container to something dark (we use the ID map in our examples; adapt as needed):
#map {
    background: hsl(0, 0%, 2%);
}
Full page example
Here's a simple full-page example in vanilla JavaScript using our satellite style.
To make experimenting easy, we've packaged the example code as a JSFiddle playground. Click the "Try it in JSFiddle" button to try it right from your web browser.
<!DOCTYPE html>
<html>
    <head>
        <meta charset="utf-8" />
        <title>3D Globe Map Demo</title>
        <meta name="viewport" content="initial-scale=1,maximum-scale=1,user-scalable=no" />
        <script type="text/javascript" src="//unpkg.com/maplibre-gl@5.23.0/dist/maplibre-gl.js"></script>
        <link href="//unpkg.com/maplibre-gl@5.23.0/dist/maplibre-gl.css" rel="stylesheet" />
        <style type="text/css">
            body {
              margin: 0;
              padding: 0;
            }

            #map {
              position: absolute;
              top: 0;
              bottom: 0;
              width: 100%;
              background: hsl(0, 0%, 2%);
            }
        </style>
    </head>
    <body>
        <div id="map"></div>
        <script type="text/javascript">
         var map = new maplibregl.Map({
           container: 'map',
           // Discover more styles at https://docs.stadiamaps.com/themes/
           style: 'https://tiles.stadiamaps.com/styles/alidade_satellite.json',
           center: [12, 53],  // Initial focus coordinate
           zoom: 2
         })
           // Add zoom and rotation controls to the map
           .addControl(new maplibregl.NavigationControl())
           // Add a globe toggle control
           .addControl(new maplibregl.GlobeControl());

         // MapLibre GL JS does not handle RTL text by default,
         // so we recommend adding this dependency to fully support RTL rendering if your style includes RTL text
         maplibregl.setRTLTextPlugin('https://unpkg.com/@mapbox/mapbox-gl-rtl-text@0.4.0/dist/mapbox-gl-rtl-text.js');

         // Configure globe projection
         map.on('style.load', () => {
            map.setProjection({
                type: 'globe',
            });
         });
        </script>
    </body>
</html>
Next Steps
Looking for more inspiration? Check out the MapLibre GL JS Examples to discover other ways to enhance your maps.
Once you're ready to move beyond localhost testing, sign up for a free Stadia Maps account,
and we'll walk through the next steps.