How to Set Up Leafy Maps to use Stadia Maps on Bubble.io
Free
Starter
Standard
Professional
This tutorial will walk you through the process of building a simple route drawing application using Bubble.io, the Leafy Maps plugin, a table of geographic coordinates (latitude and longitude) representing locations, and the routing functionality of Stadia Maps.
Note
Before getting started, if you don't already have one, you will need to sign up for a Stadia Maps account.
Later in the tutorial, you will add your Bubble.io app's domain to your account in the client dashboard and also copy your API key.
You can find out more about how we authenticate requests in the Authentication & Limits documentation.
Video Walkthrough
Creating an application in Bubble.io
-
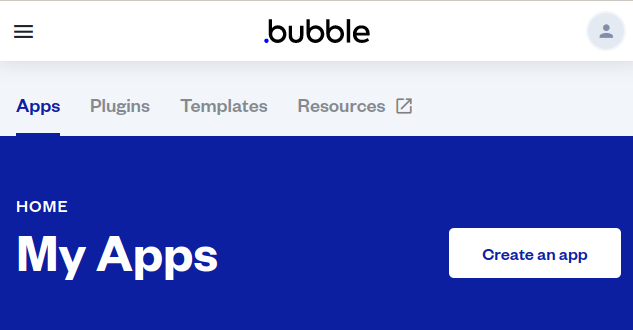
Navigate to your Bubble.io Apps tab and click Create an App.
-
After you give your application a name, your Bubble.io URL is generated. This URL will be added to a property in your Stadia Maps account. In our example, the URL is
stadia-maps-tutorial.bubbleapps.io.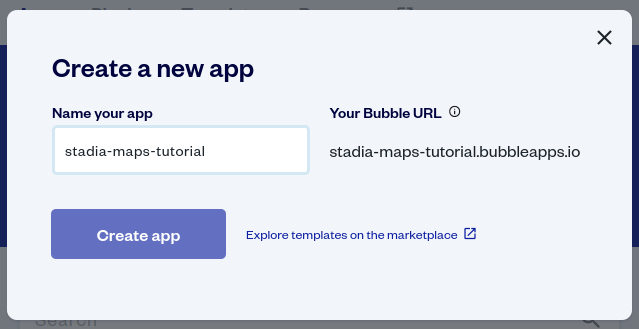
-
Click Create App to finalize the creation of your new Bubble.io app.
Adding your Bubble.io App URL to Stadia Maps
-
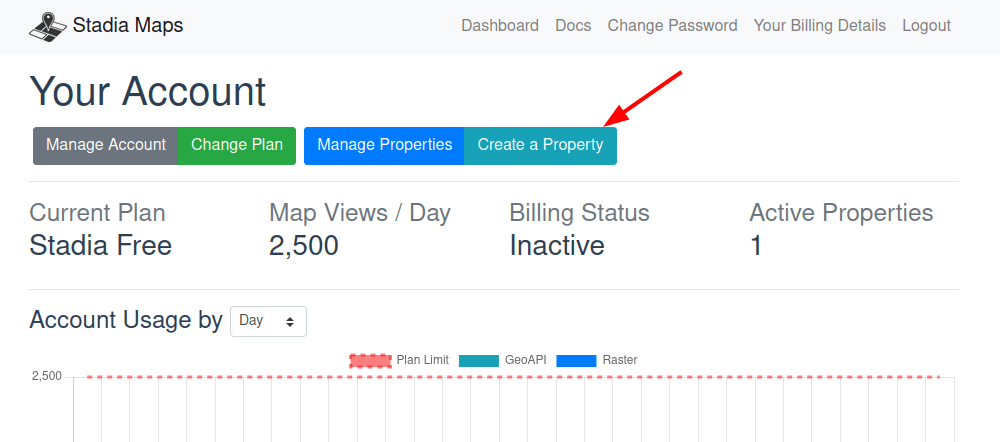
Log in to Stadia Maps and click Create a Property
-
Give your new property a name and click Create

-
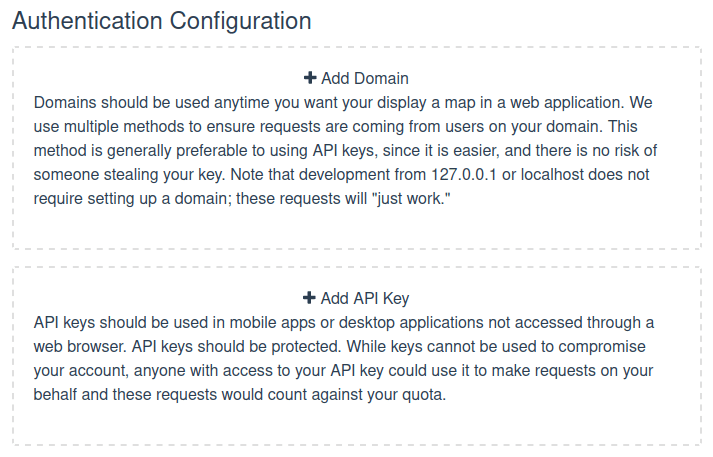
With your new property created, scroll down until you see the Authentication Configuration section. You will need to add a Domain and copy your API key for this tutorial.
-
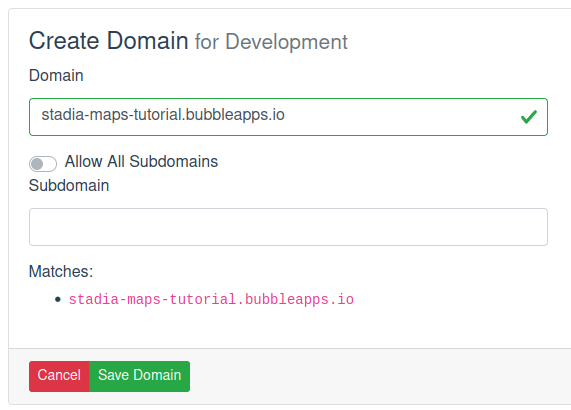
Click + Add Domain, enter the URL you generated for your Bubble.io app above, and click Save Domain.
-
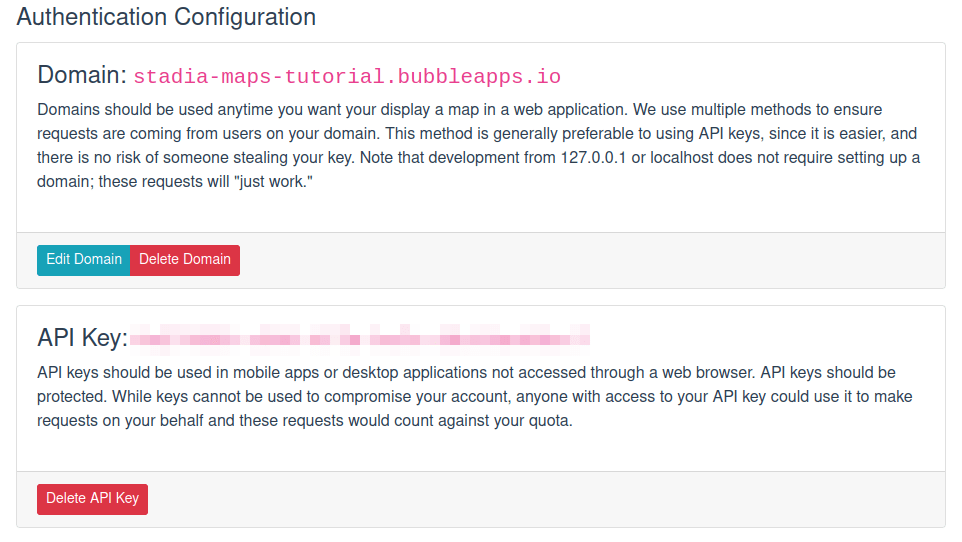
Click + API Key and a new API key will be generated instantly. You will be copying and pasting this key into the Leafy Maps configuration later on in the tutorial.
After everything has been set up, your Stadia Maps Property Authentication Configuration page should look something like this:
Installing and Configuring the Leafy Maps Plugin
With your Bubble.io App created and your property added in your Stadia Maps account, you can now begin the creation of our routing app. The first thing you need to do is install the Leafy Maps plugin.
-
In Bubble.io, click on the pencil icon to begin editing your application

-
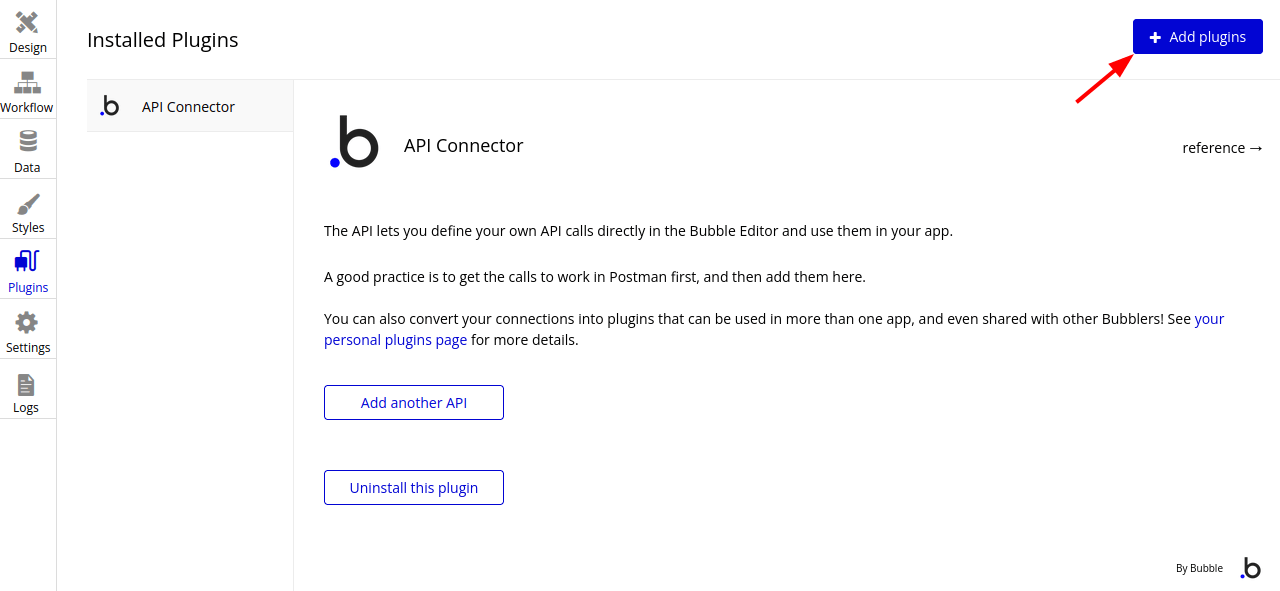
In the left-hand sidebar, click Plugins and then click + Add plugins
-
In the search text box, type Leafy Maps and the plugin should display. Click Install.

-
If successful, the button's name will change to Uninstall. Click Done to return to the main Plugin page. Leafy Maps should be selected to bring up its configuration page.
-
Scroll down until you see the Get route - key (path) - dev. labeled text box. Copy and paste your Stadia Maps API key here.
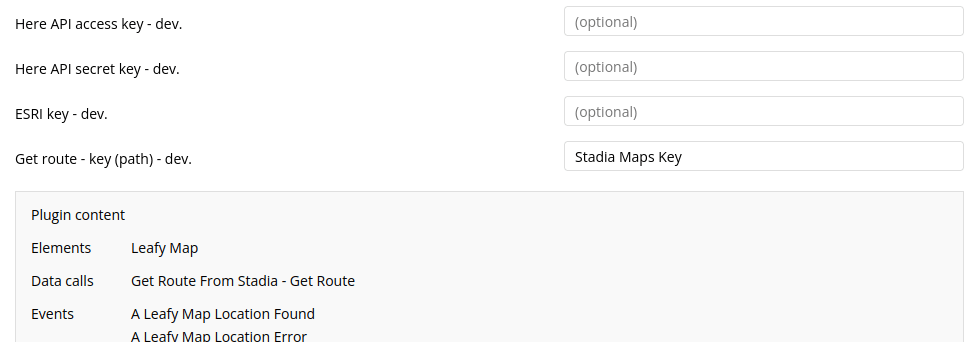
The settings are automatically saved. You have now installed and configured the Leafy Maps plugin.
Creating your Table of Locations
Next, you'll need to create a table of locations to use in our route. We specify these by latitude and longitude. In this example, you'll be entering a static list of coordinates manually, but any method of getting these locations into your Bubble database will work.
-
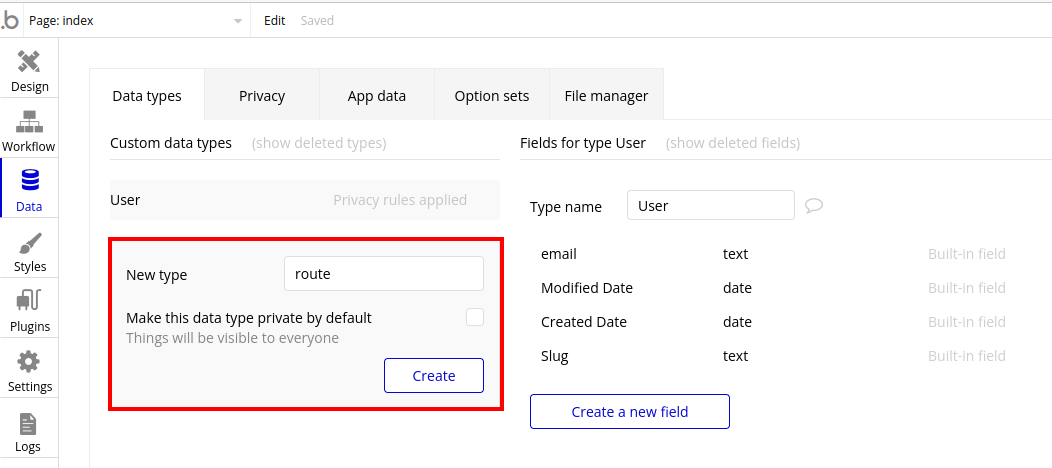
Navigate to the Data area from the left-hand sidebar. Under the New type section, give your new type a name. In this tutorial you will name it route. Click Create.
-
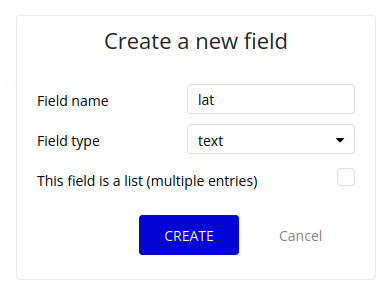
You now need to create two fields for the route data type: one for latitude and another for longitude. Click Create a new field and use lat as the Field name and text as the Field type. Click Create. Repeat this process, but name this field long for longitude.
-
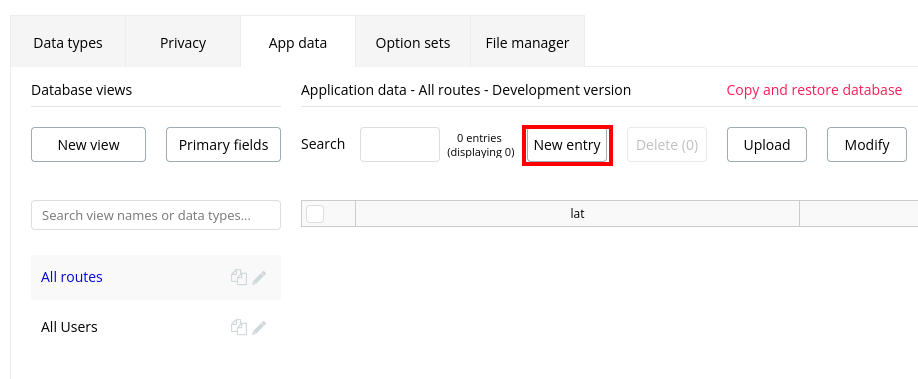
Now you can populate the data type with coordinates. Navigate to the App Data section and click Add Entry.
-
Enter in your coordinates and click Create for each one.
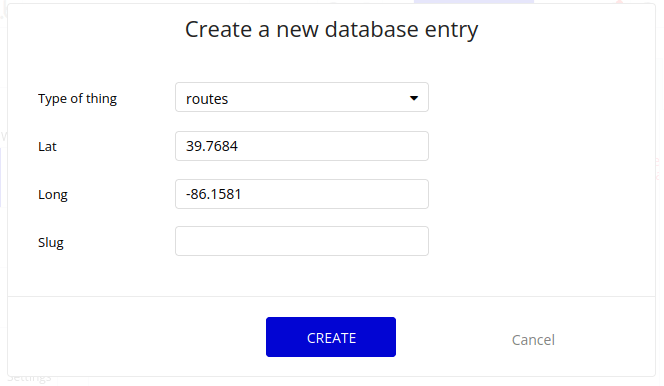
This tutorial is using the following set of coordinates to create a route near Indianapolis, Indiana in the United States:
lat long 39.7684 -86.1581 39.8098 -86.3225 39.8434 -86.3978 You will receive a confirmation after each one.
With the coordinates entered, you can now prepare the graphical elements for the routing app.
Drawing Your Elements
In this tutorial, you will only need two UI elements: a Leafy Map and a button.
-
Navigate to the Design area from the left-hand sidebar. You can either search for Leaf Map by typing in the Search for new elements... or locate it underneath the Visual elements section. Leafy Maps is listed near the bottom. Left-click and drag the element onto the canvas. Repeat this process for a button element as well.
-
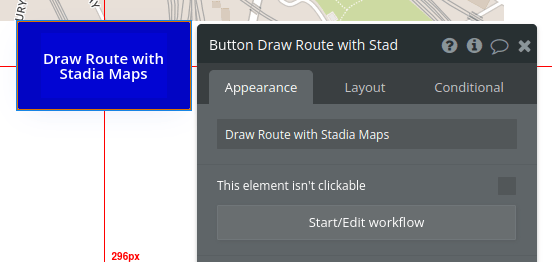
Double-click on the newly created button. The properties panel will appear. Update the ...edit me... text to Draw Route with Stadia Maps.
Configuring Leafy Maps to use a Stadia Map Style
-
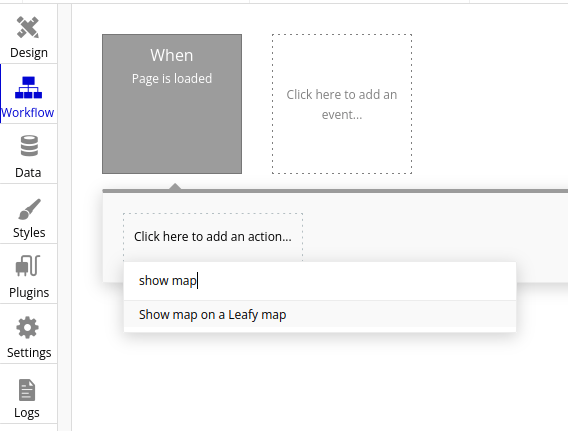
Navigate to the Workflow area. Make sure you are on the When Page is loaded event. Press Click here to add an action and search for show map. Select the Show map on a Leafy map option.
-
A properties panel will appear. You will need to update the following settings accordingly:
Setting Name Value Unique map name tutorial-map Tile provider Stadia Initial view latitude 39.7684 Initial view longitude -86.1581 Zoom level 10 Stadia tile Alidade Smooth Your final properties panel should look something like this:

Route Drawing Button
-
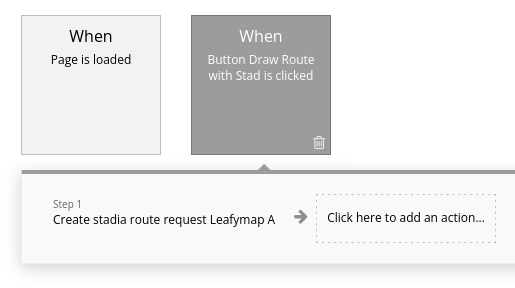
Navigate to the Workflow area. Make sure you are on the When Button Draw Route with Stadia Maps is clicked event. Click on the Click here to add an action and search for stadia. Select the Create stadia route request option. The new action will be created.
-
Click on the new action and update its settings accordingly:
Setting Name Value List of latitudes Insert Dynamic Data->Search for routes->each item's lat List of longitudes Insert Dynamic Data->Search for routes->each item's long 
-
Next, you'll add the drawing action. Click on the Click here to add an action and search for draw line. Select the Draw line on a Leafy map option.
-
Click on the new action and update its settings accordingly:
Setting Name Section Value Use encoded shape? Main Checked Encoded shape Main Insert Dynamic Data->Get Data from an external API Encoded shape API Provider Get route from Stadia - Get route Encoded shape (path) JSON Insert Dynamic Data->Leafy Map A->Stadia route request body Encoded shape Main Get route from Stadia - Get route->body trip legs->each item's shape Line color Main #EB9900Weight Main 3 
Test the App
You are now ready to test the app.
-
Click on the Preview option in the upper right-hand corner.
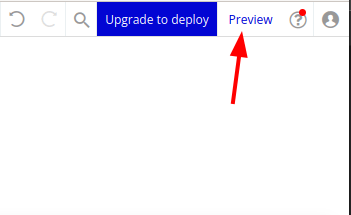
A new tab will open, showing you an application based on your element layout from the Design section.
-
Click Draw Route with Stadia Maps.
-
Watch your route draw on the map.
Congratulations! You have now successfully created a route drawing app with Leafy Maps and Stadia Maps using Bubble.io.