How to use Raster Base Layers from Stadia Maps in QGIS
Free
Starter
Standard
Professional
QGIS is a free open-source (FOSS) GIS application used by novices and professionals alike to create maps and make decisions based on spatial analysis. It is utilized by hundreds of thousands of people, and is one of the most powerful GIS applications available today.
In this tutorial, we'll show you how to use tiles from Stadia Maps as a raster base layer in QGIS. Ready? Let’s jump right in!
Don't have QGIS installed yet?
You can install QGIS easily by following the directions on their download page. Instructions and packages are available for Windows, macOS, Linux, FreeBSD, and OpenBSD.
Select a Style
For this tutorial, we will use the excellent Toner style from Stamen Design. This is a great basemap for a variety of data visualization and analysis tasks in QGIS.
Here's the URL for the Stamen Toner. Copy this as we'll use it in the next step.
https://tiles.stadiamaps.com/tiles/stamen_toner/{z}/{x}/{y}@2x.png
Other Styles from Stadia Maps
Looking for something else? Our full style library has a wide range of options. You can get the QGIS URL for any style via the from the URLs tab on the style page. We have both standard and EU endpoints available, with the EU endpoints ensuring your requests are only handled by our servers located within the EU.
We also offer background and label-only layers for the Stamen styles, which you use to keep labels visible on top.
Add an XYZ Tile Connection to QGIS
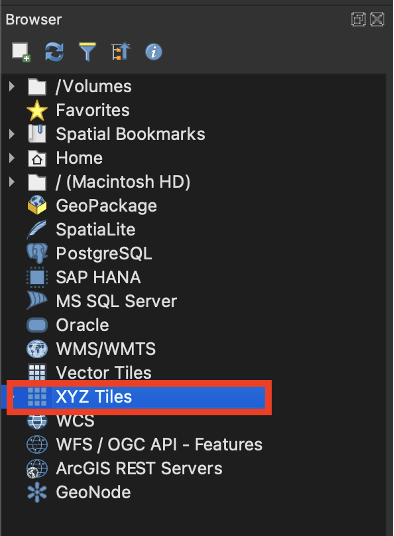
To add the Alidade Smooth base layer in QGIS, look to your Browser panel (typically on the left side of the screen) and find the "XYZ Tiles" option.
Right click (CTRL + click or two-finger click on some Apple hardware) "XYZ Tiles" and choose "new connection" from the context menu.
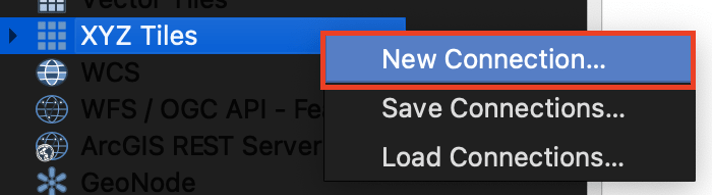
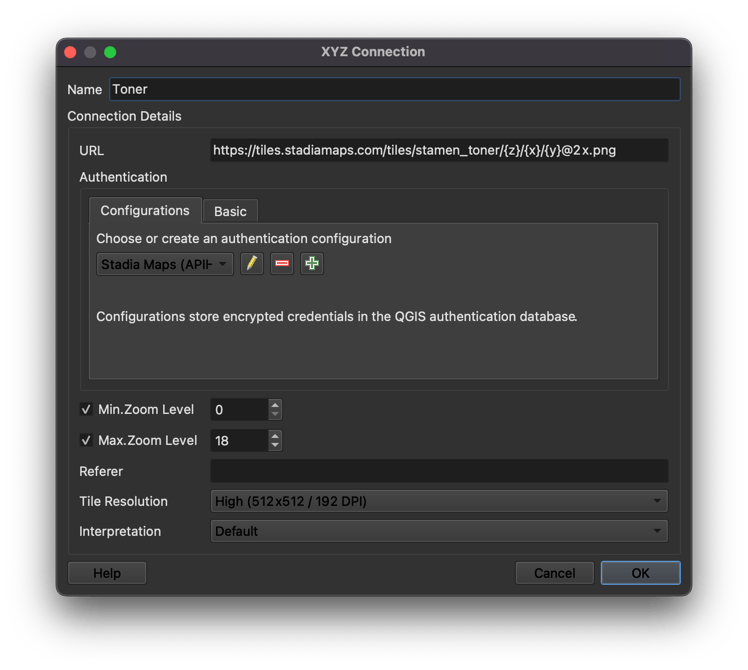
This will bring up a new XYZ Connection dialog.
- Enter a useful name like "Toner" in the name field.
- Paste the XYZ PNG format URL you copied in the previous step as the URL (check the warning below though!).
- Set the resolution to high (512x512px) for best results.
Warning
Your web browser will probably automatically copy a trailing newline character when you click the copy button. This isn't an issue for many applications, but when you paste the URL into QGIS, it will get converted to an extra space at the end of the URL.
Here's a screenshot illustrating what to watch out for. See that extra bit of space at the end of the URL? You need to delete this or else you'll get an "Access Denied" error, which is a bit confusing.

We're almost done, but don't click OK just yet! We need an API key before we finish up the connection.
Get Your Stadia Maps API Key
Before we finish the connection setup, you'll need a Stadia Maps API key.
- Sign in to the client dashboard. (If you don't have an account yet, sign up for free; no credit card required!)
- Click "Manage Properties."
- If you have more than one property (ex: for several websites or apps), make sure you have selected the correct property from the dropdown at the top of the page.
- Under "Authentication Configuration," you can generate, view or revoke your API key.
Video: How to generate your API key
Configure Authentication in QGIS
Now we're ready to jump back to QGIS. Click the green plus button in the XYZ Connection dialog under authentication configurations to create a new configuration. If this is your first time setting up an authenticated connection in QGIS, you will need to set up a master password. This allows you to store secrets securely.
Once you've either set up a new master password or authenticated, you'll see a screen that looks like the one
below. Fill out the form as shown, with Authorization in the header key column, and Stadia-Auth YOUR-API-KEY
in the header value. You'll need to replace YOUR-API-KEY with your actual API key.
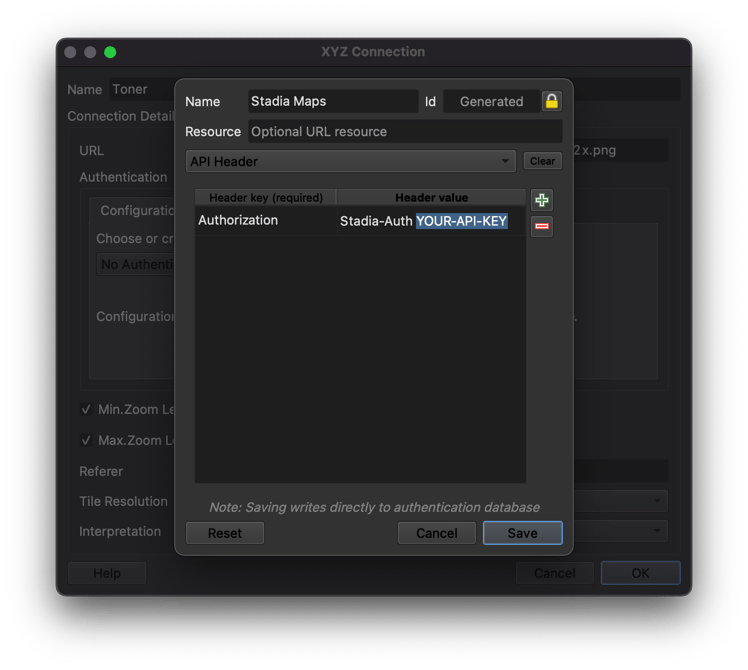
After saving the authentication configuration, you should see the authentication configuration.
Tip
Now that you've set this authentication set up once, you can use it for any of our other basemap layers!
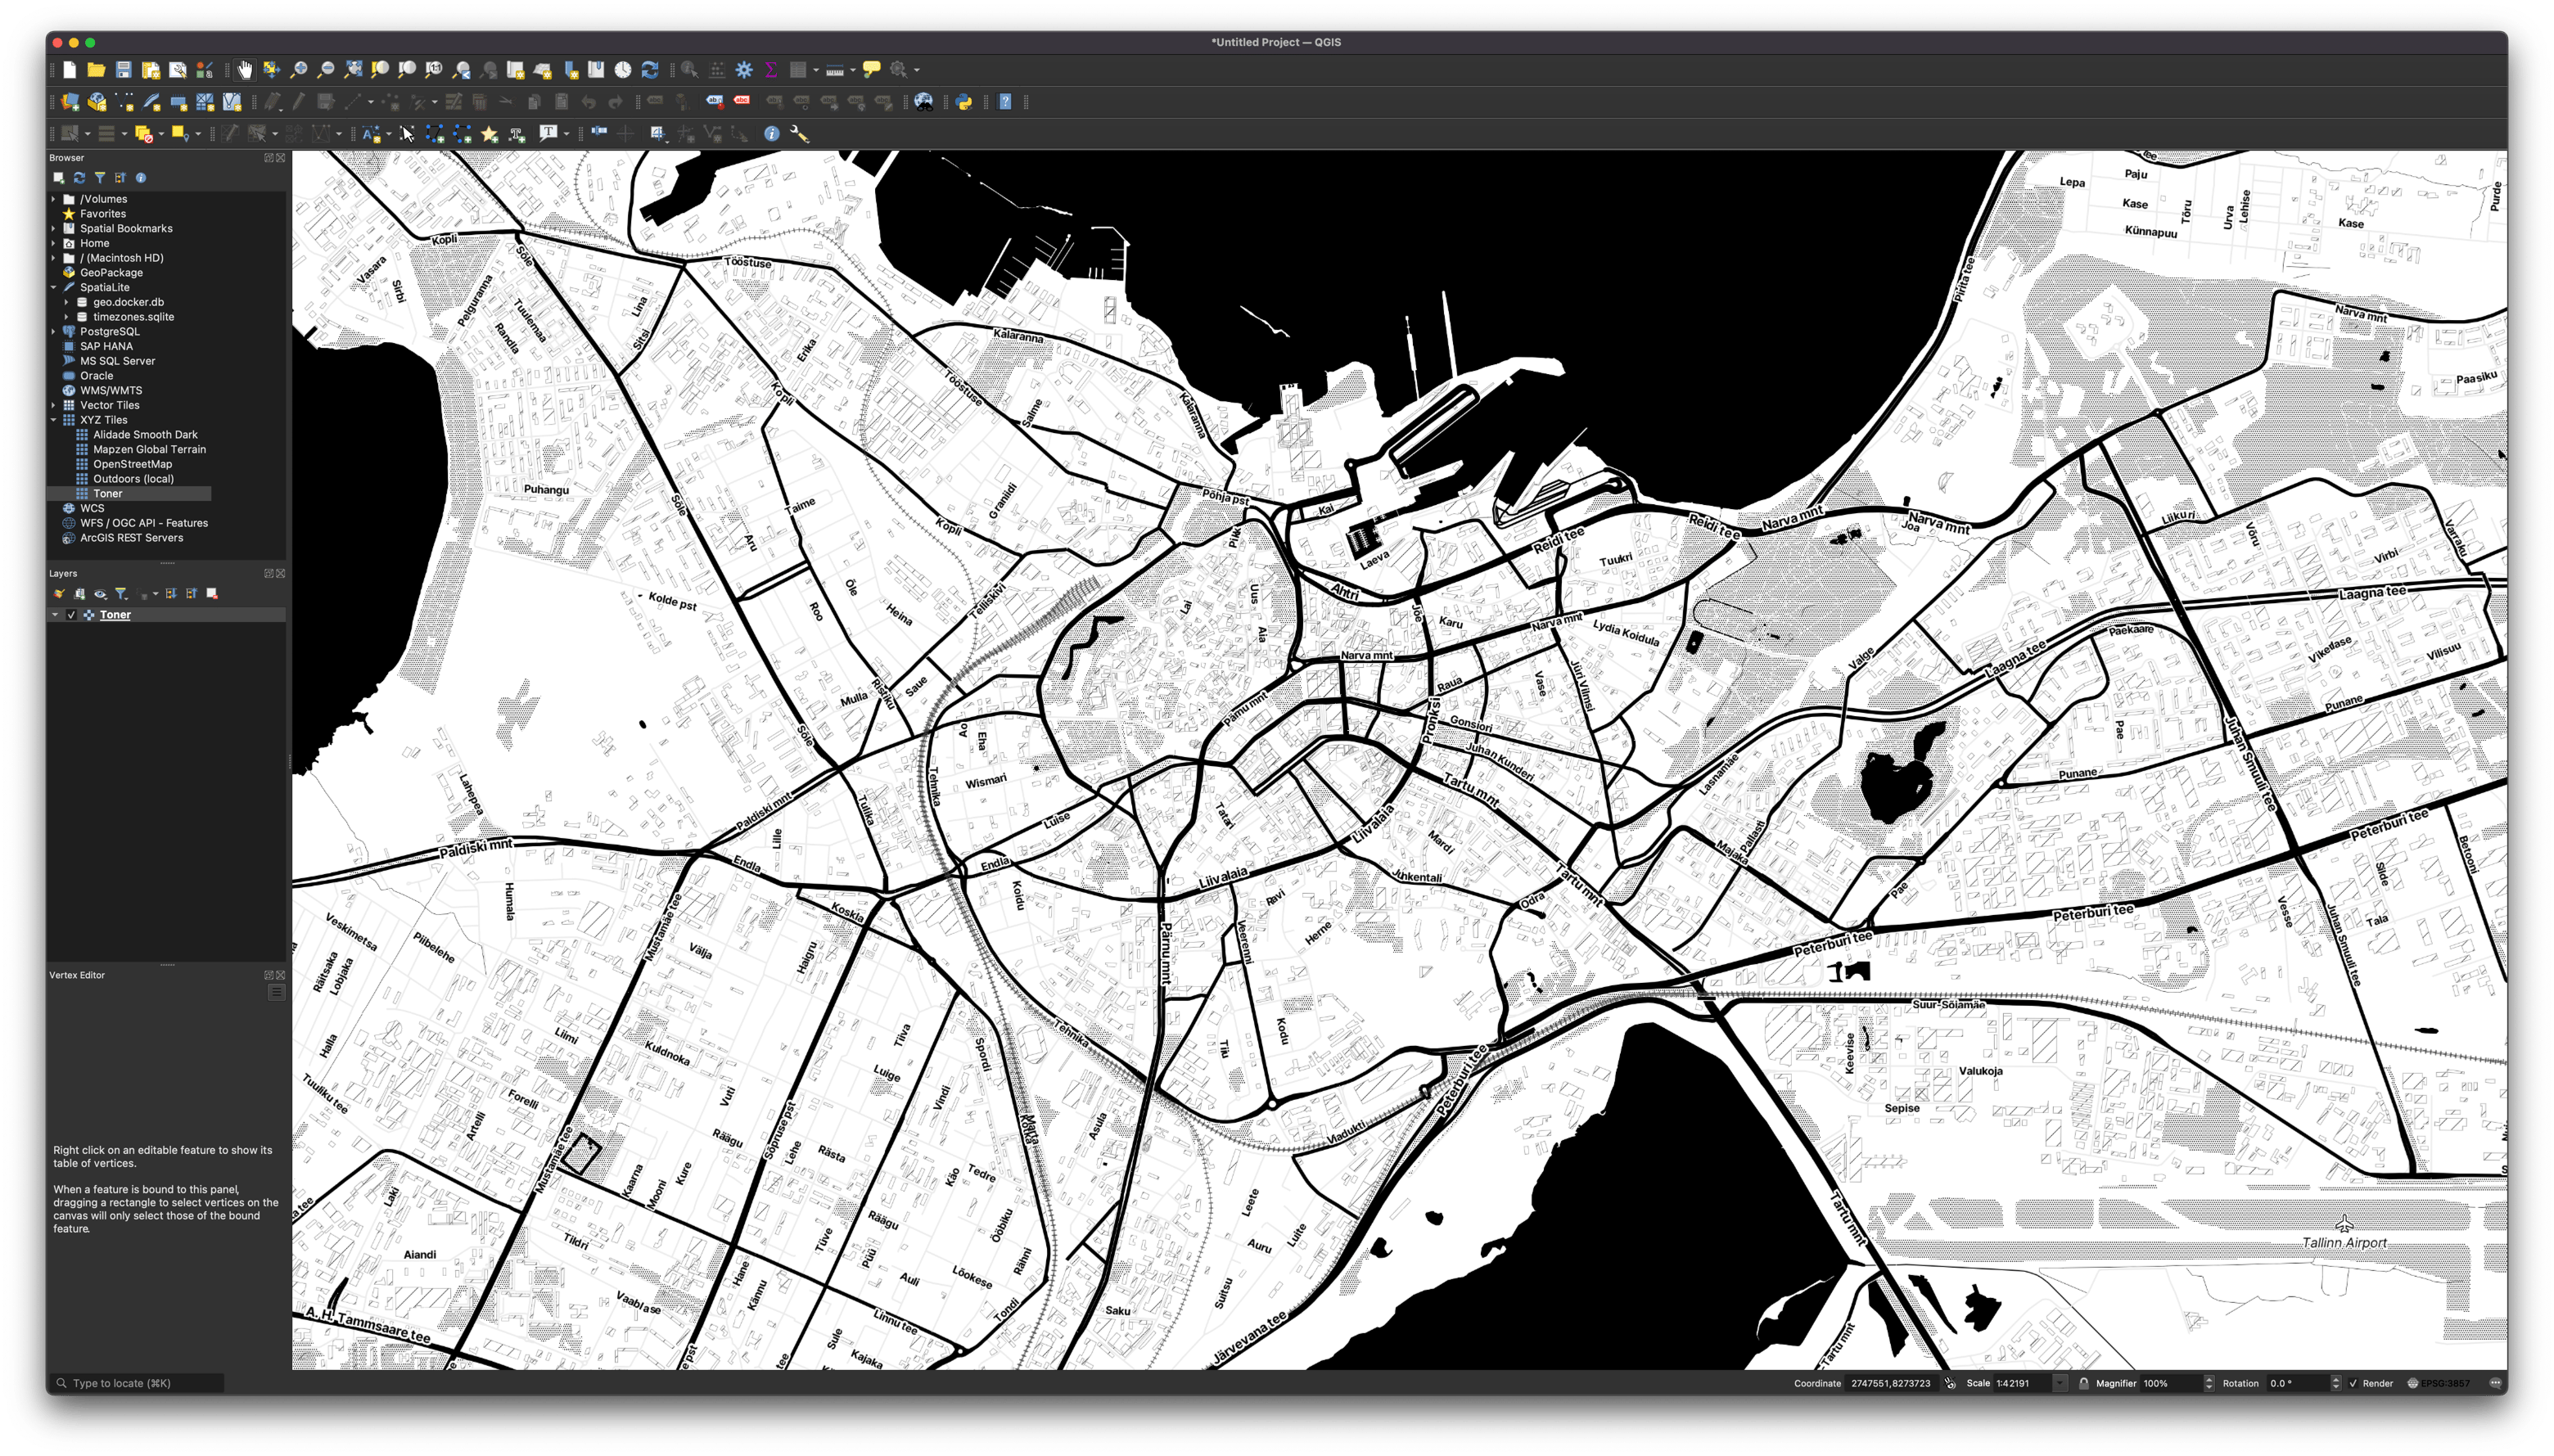
Now you should see the new source in the QGIS Browser panel under XYZ Tiles.
Double-click on the source under XYZ Tiles to add it as a new layer.
Voilà! Now you're ready to start building your map in QGIS! If you encounter an authentication error, please re-check the steps above, paying special attention to the warning.
Next Steps
QGIS has hundreds of features, and thousands of third-party plugins. One of our favorites is the QuickOSM plugin, which lets you quickly pull in data from OpenStreetMap using the Overpass API.
With just a few clicks, you can grab, for example, all the environmental monitoring stations in an area and add them to your map! Nice! You can also paste OverPass queries directly after testing them on OverPass Turbo to do visualization and spatial analysis.

Hint: if you try this query in the right area, it might lead you to a classic Stamen Easter Egg 

The QGIS plugin repository is absolutely full of useful tools like this! To learn more about QGIS, check out their extensive documentation.