Generating a Geospatial API Client in Kotlin
Free
Starter
Standard
Professional
In this tutorial, we'll explore how to build your own OpenAPI client for the Stadia Maps API using Kotlin, one of the popular languages available for the JVM. If you're just looking for the quickest way to get started accessing our APIs, the official SDK is probably your best bet. This tutorial is designed for those who want something more customized, like using okhttp instead of retrofit.
By the end of this tutorial, you'll have a fully functional Kotlin application with an always up-to-date API client, which you can customize using OpenAPI generator options. We'll also demonstrate how compute routes between two points, and give you what you need to craft even the most complex API requests. Let's get started!
Create a project
Demo Project
This tutorial is a bit longer than usual due to the amount of preparation involved, which is mostly boilerplate. If you'd like to get started hacking right away or reverse engineer using this tutorial as reference, you can grab the full code from GitHub. Then jump ahead to the section on getting an API key to resume the fun.
To start, we'll need a Gradle project. If you've already got an existing app, you can skip ahead to the next step.
We'll keep things simple and stay inside IntelliJ, but you can also use gradle init if you prefer.
In IntelliJ, go to the File menu and select New Project, or click "New Project" on the launch screen. We'll use Kotlin as the primary language, and the Gradle build system with Kotlin build scripts. We won't be using any particularly fancy features, so if you're still rolling with Java 11, that's fine.

Set up app and client subprojects
Our final project structure will have a root with two subprojects, app and generated-client.
This will help us keep our app code separate from the generated code.
Create the app subproject
Tip
Skip this step if you used gradle init or already have a multi-project build.
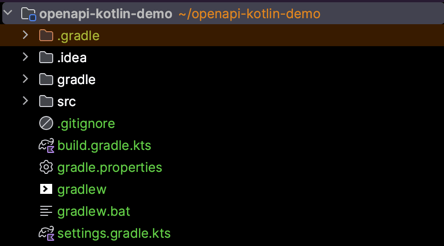
If you created the project with IntelliJ, everything starts at the root level like so:
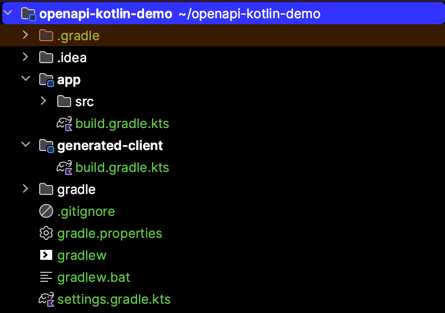
We'll move the IntelliJ sample code out of the root to create a new app subproject like so:
- Create a new directory called
appin the project root. - Move
srcandbuild.gradle.ktsinsideapp. - Add
include("app")tosettings.gradle.kts.
Create the generated-client gradle project
- Create a new directory called
generated-clientin the project root. - Add
include("generated-client")tosettings.gradle.kts. - Create a file named
build.gradle.kts(we'll fill it in later).
Add common versions to gradle.properties
We're going to be building our client with Retrofit, and we need to reference the
version number at several points in build scripts. Adding this line to your gradle.properties
file will reduce duplication later.
retrofitVersion=2.11.0
Set up the Kotlin plugin for multi-project builds
If you don't set up the Kotlin plugin in a particular way, bad things might
happen in multi-project builds. Edit your app/build.gradle.kts as shown
below.
plugins {
-    kotlin("jvm") version "1.8.0"
+    kotlin("jvm")
    application
}
We'll add the version back in settings.gradle.kts. Your final file
should look like this:
plugins {
    kotlin("jvm") version "1.8.0" apply false
}

rootProject.name = "openapi-kotlin-demo"
include("app")
include("generated-client")
We're now done the project structural boilerplate, and your directory structure should look like this after a gradle sync.
Generate the API client
Next, we're going to use some tools to generate an API client for us from the OpenAPI spec. There's a lot of code in this build script, but we've highlighted the important parts (click the + to expand for details).
import org.gradle.api.DefaultTask
import org.gradle.api.tasks.Input
import org.gradle.api.tasks.OutputFile
import org.gradle.api.tasks.TaskAction
import org.hidetake.gradle.swagger.generator.GenerateSwaggerCode

plugins {
    kotlin("jvm")
    id("org.hidetake.swagger.generator") version "2.19.2"
}

repositories {
    mavenCentral()
}

dependencies {
    val retrofitVersion: String by project  // (1)

    swaggerCodegen("org.openapitools:openapi-generator-cli:7.5.0") // (2)

    // Dependencies of the generated code. Check out `build.gradle` in your build folder later if you're curious.
    implementation("com.squareup.moshi:moshi-kotlin:1.15.2")
    implementation("com.squareup.moshi:moshi-adapters:1.15.2")
    implementation("com.squareup.okhttp3:logging-interceptor:4.12.0")
    implementation("com.squareup.retrofit2:retrofit:$retrofitVersion")
    implementation("com.squareup.retrofit2:converter-moshi:$retrofitVersion")
    implementation("com.squareup.retrofit2:converter-scalars:$retrofitVersion")
}

kotlin {
    jvmToolchain(17)
}

// Bit of a hack because the generator can't download files at the time of this writing:
// https://github.com/int128/gradle-swagger-generator-plugin/issues/167
open class DownloadResource : DefaultTask() {
    @get:Input
    lateinit var sourceUrl: String

    @get:OutputFile
    lateinit var target: File

    @TaskAction
    fun download() {
        ant.withGroovyBuilder {
            "get"("src" to sourceUrl, "dest" to target)
        }
    }
}

tasks.register("downloadOpenAPISpec", DownloadResource::class.java) {  // (3)
    sourceUrl = "https://api.stadiamaps.com/openapi.yaml"
    target = File("openapi.yaml")
}

tasks.named("generateSwaggerCode").configure {
    dependsOn("downloadOpenAPISpec")  // (4)
}

swaggerSources {  // (5)
  register("stadiamaps") {
      val validationTask = validation

      setInputFile(file("openapi.yaml"))
      code(delegateClosureOf<GenerateSwaggerCode> {
          language = "kotlin"
          library = "jvm-retrofit2"
          dependsOn(validationTask)
      })
  }
}

// Comment this out if you do NOT want the code gen to run every time you build.
// There is an HTTP cache by default, so it won't necessarily make a request every single build.
tasks.compileKotlin.configure {
    dependsOn(tasks.generateSwaggerCode)
}

sourceSets {
    val main by getting
    val stadiamaps by swaggerSources.getting
    main.kotlin.srcDir("${stadiamaps.code.outputDir}/src/main/kotlin")
}
- This is automatically loaded from our
gradle.properties - The
org.hidetake.swagger.generatorgradle plugin provides a common interface to several code generation backends. We chose this one from OpenAPITools because it is a bit more modern and actively developed than Swagger CodeGen. - Here we configure a task to download the OpenAPI spec and save it to
openapi.yml. - Adding a dependency ensures that the download task runs automatically before code generation. This means you will always have an up-to-date client with no additional effort!
swaggerSourcesis where the code generation happens. The Kotlin generator is extremely configurable and will work with several major HTTP libraries. We've chosen Retrofit as the library for this tutorial as has a wonderful API and supports newer Kotlin features like coroutines, but you can choose another HTTP library and configure additional options. See the documentation for details.
Finally, we're ready to generate the code! You can either run ./gradlew generateSwaggerCode (gradlew.bat for
Windows users) or execute the generateSwaggerCode gradle task in IntelliJ. If all goes well,
your auto-generated code is ready to use!
We've come a long way, so let's take a moment to review.
You are now set up with two subprojects: one for the "main" app, and one for the generated API client. You've also learned how to generate code straight from our API specification automatically as part of your build process.
Set up the app Build Script
Next, let's turn our attention to the app project, starting with the build script.
Fortunately this one is a lot shorter. If you picked up the plugin change above, there are only one or
two things you need to change from the defaults.
- Add dependencies.
- Ensure that the kotlin
jvmToolchainis compatible between the two projects (we use 17 for both here).
Your full file should look something like this:
plugins {
    kotlin("jvm")
    application
}

group = "org.stadiamaps"
version = "1.0-SNAPSHOT"

repositories {
    mavenCentral()
}

dependencies {
    val retrofitVersion: String by project

    testImplementation(kotlin("test"))

    implementation(project(":generated-client"))

    // (1)
    implementation("com.squareup.moshi:moshi-kotlin:1.15.2")
    implementation("com.squareup.moshi:moshi-adapters:1.15.2")
    implementation("com.squareup.okhttp3:logging-interceptor:4.12.0")
    implementation("com.squareup.retrofit2:retrofit:$retrofitVersion")
    implementation("com.squareup.retrofit2:converter-moshi:$retrofitVersion")
    implementation("com.squareup.retrofit2:converter-scalars:$retrofitVersion")
}

tasks.test {
    useJUnitPlatform()
}

kotlin {
    jvmToolchain(17)
}

application {
    mainClass.set("MainKt")
}
- We need to re-state the
generated-clientdependencies here as well. Refer to the Gradle Manual for more info.
Get a Stadia Maps API key
To actually make any API calls, we'll need an API key.
- Sign in to the client dashboard. (If you don't have an account yet, sign up for free; no credit card required!)
- Click "Manage Properties."
- If you have more than one property (ex: for several websites or apps), make sure you have selected the correct property from the dropdown at the top of the page.
- Under "Authentication Configuration," you can generate, view or revoke your API key.
Video: How to generate your API key
Set up the API client in Kotlin
It's been a long road getting set up, but now we are finally ready to build something with the API!
First, we'll do some generic setup to create the base ApiClient, configure authentication, and
create a service to access the routing API.
Tip
Our APIs are divided up into several groups such as Geospatial and Routing to keep things organized. OpenAPI generators typically classify each of these as its own "API" when it comes to generated service definitions.
val client = ApiClient()
client.addAuthorization("ApiKeyAuth", ApiKeyAuth("query", "api_key", "YOUR-API-KEY"))

val routingService = client.createService(RoutingApi::class.java)
Let's get some directions! We'll construct a route request between two points to keep it simple, starting at the Tallinn airport and ending at the Kultuurikatel, a popular event venue.
val tll = RoutingWaypoint(59.416411, 24.798778)
val kultuurikatel = RoutingWaypoint(59.444169, 24.751779)

val waypoints = listOf(tll, kultuurikatel)
// Set up the request.
// Note: this code is blocking for demonstration purposes.
// If you're using Kotlin with coroutines,
// you can also use these asynchronously within suspend functions.
// Synchronous code can enqueue a callback to avoid blocking
// (you'll definitely want to do one of these instead when on the main thread of an app).
// See the docs for details: https://square.github.io/retrofit/2.x/retrofit/retrofit2/Call.html
val route = routingService.route(RouteRequest(waypoints, CostingModel.auto)).execute().body()

if (route != null && route.trip != null) {
    val summary = route.trip.summary
    println("Found route with length of ${summary.length}km and duration of ${summary.time} seconds")
}
Run the Project
If you've set up the project using IntelliJ, you should have a main function, which you can add the above code to. Once you're ready to run, click the green play button in the gutter to run your application in the console.

You should see some output like this:
Found route with length of 4.852km and duration of 443.362 seconds
Congratulations! You've made your first API call from Kotlin!
Next Steps
This is just scratching the surface of what you can build with the Stadia Maps APIs. One of the great things about JVM languages is that they have powerful IDEs that let you explore libraries without having to reach for the documentation every time. And, because the library code is autogenerated, you'll be able to get the latest features as we release them with no additional effort!
Go exploring, and let the autocomplete function guide you. We've even put together an example project to get you started. The project also shows you how to use our time zone info, elevation, and geocododing APIs. Get the code on GitHub.