Autocomplete Search for SwiftUI
Add an autocomplete view to your SwiftUI app with just a few lines of code. Our SwiftUI view takes care of the API calls so you can focus on building your app.
- Interactive - React when the user taps a result.
- Contextual - Focus the search near a location, providing the most relevant results first.
- Localized - Place names are translated automatically based on the device locale (where available).
- Customizable - Provide any SwiftUI view for complete control over the look and feel of the results.
Quickstart
You can add the Stadia Maps Autocomplete Search package to your app using the Swift Package Manager (SPM).
The Xcode UI changes frequently, but you can usually add packages to your project using an option in the File menu.
Then, you'll need to paste in the repository URL to search: https://github.com/stadiamaps/swiftui-autocomplete-search.
See Apple's documentation
for the latest detailed instructions.
Getting an API Key
Next, you'll need to generate an API key.
- Sign in to the client dashboard. (If you don't have an account yet, sign up for free; no credit card required!)
- Click "Manage Properties."
- If you have more than one property (ex: for several websites or apps), make sure you have selected the correct property from the dropdown at the top of the page.
- Under "Authentication Configuration," you can generate, view or revoke your API key.
Video: How to generate your API key
Using the SwiftUI view
Next, import the package and set your API key.
import StadiaMapsAutocompleteSearch
private let stadiaMapsAPIKey = "YOUR-API-KEY"  // Replace with your API key
Then, in your view body, add the autocomplete search view, like this. It's really that easy! All you need is an API key and a selection handler to do something when the user taps a result.
// Somewhere in your view body....
AutocompleteSearch(apiKey: stadiaMapsAPIKey, useEUEndpoint: false, userLocation: userLocation.clLocation) { selection in
    // Do something with the selection.
    // For example, here's how to start turn-by-turn navigation
    // with Ferrostar (https://docs.stadiamaps.com/sdks/ferrostar).
    Task {
        do {
            routes = try await ferrostarCore.getRoutes(initialLocation: userLocation, waypoints: [Waypoint(coordinate: GeographicCoordinate(lat: selection.geometry.coordinates[1], lng: selection.geometry.coordinates[0]), kind: .break)])

            // Start navigating! See the Ferrostar demo apps for a full example.
            try ferrostarCore.startNavigation(route: routes!.first!)
        } catch {
            // TODO: Let the user know that routing failed.
        }
    }

}
There are a few other ways you can customize the search view, but these are all optional. We recommend setting a user location, since this improves the relevance of the results.
You can also force requests to our EU Endpoints in case you have regulatory concerns (though this will make requests outside Europe slower and less reliable).
Customizing the result views
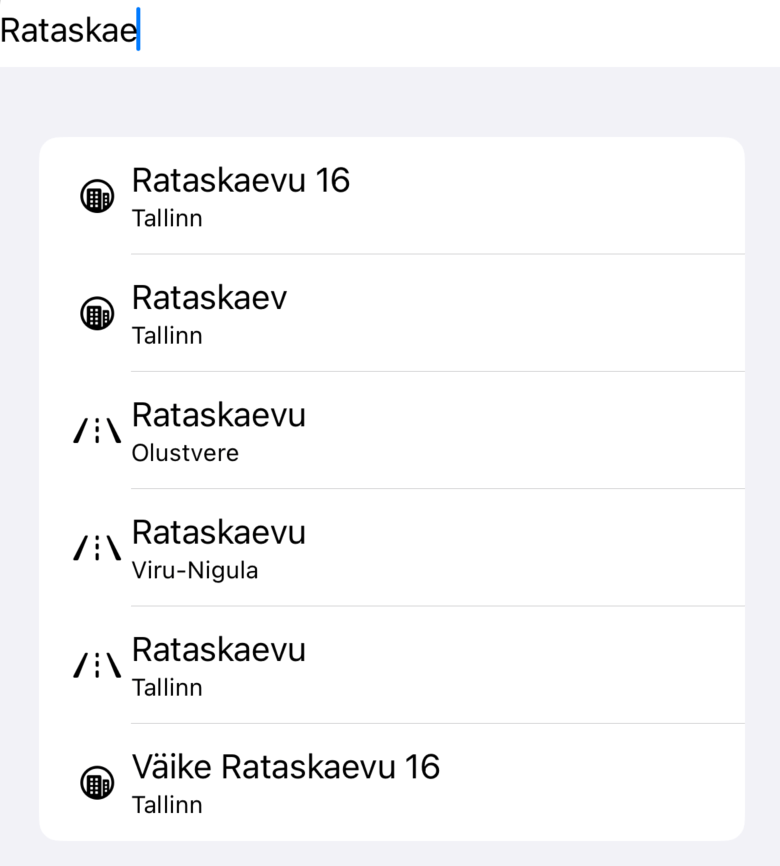
The AutocompleteSearch view includes a default view that works for many applications.
You can also create your own views via the optional @ViewBuilder argument!
Here's an example of creating your own view with SwiftUI components.
AutocompleteSearch(apiKey: previewApiKey, onResultSelected: { selection in
    // TODO: Selection handler
}) { feature, _ in
    // This custom view builder will have a classic table cell layout,
    // where the image is always a laser burst from SFSymbols.
    HStack {
        Image(systemName: "laser.burst")
        Text(feature.properties?.name ?? "<No name>")
    }
}
You don't need to do anything special to handle taps.
The AutocompleteSearch view sets up gesture recognition for you,
and calls your selection handler when necessary.
Documentation
You can browse the package documentation directly in Xcode or online at the Swift Package Index.
Source Code
This plugin is completely open source! You can find the source code on GitHub.