Autocomplete Search for Jetpack Compose
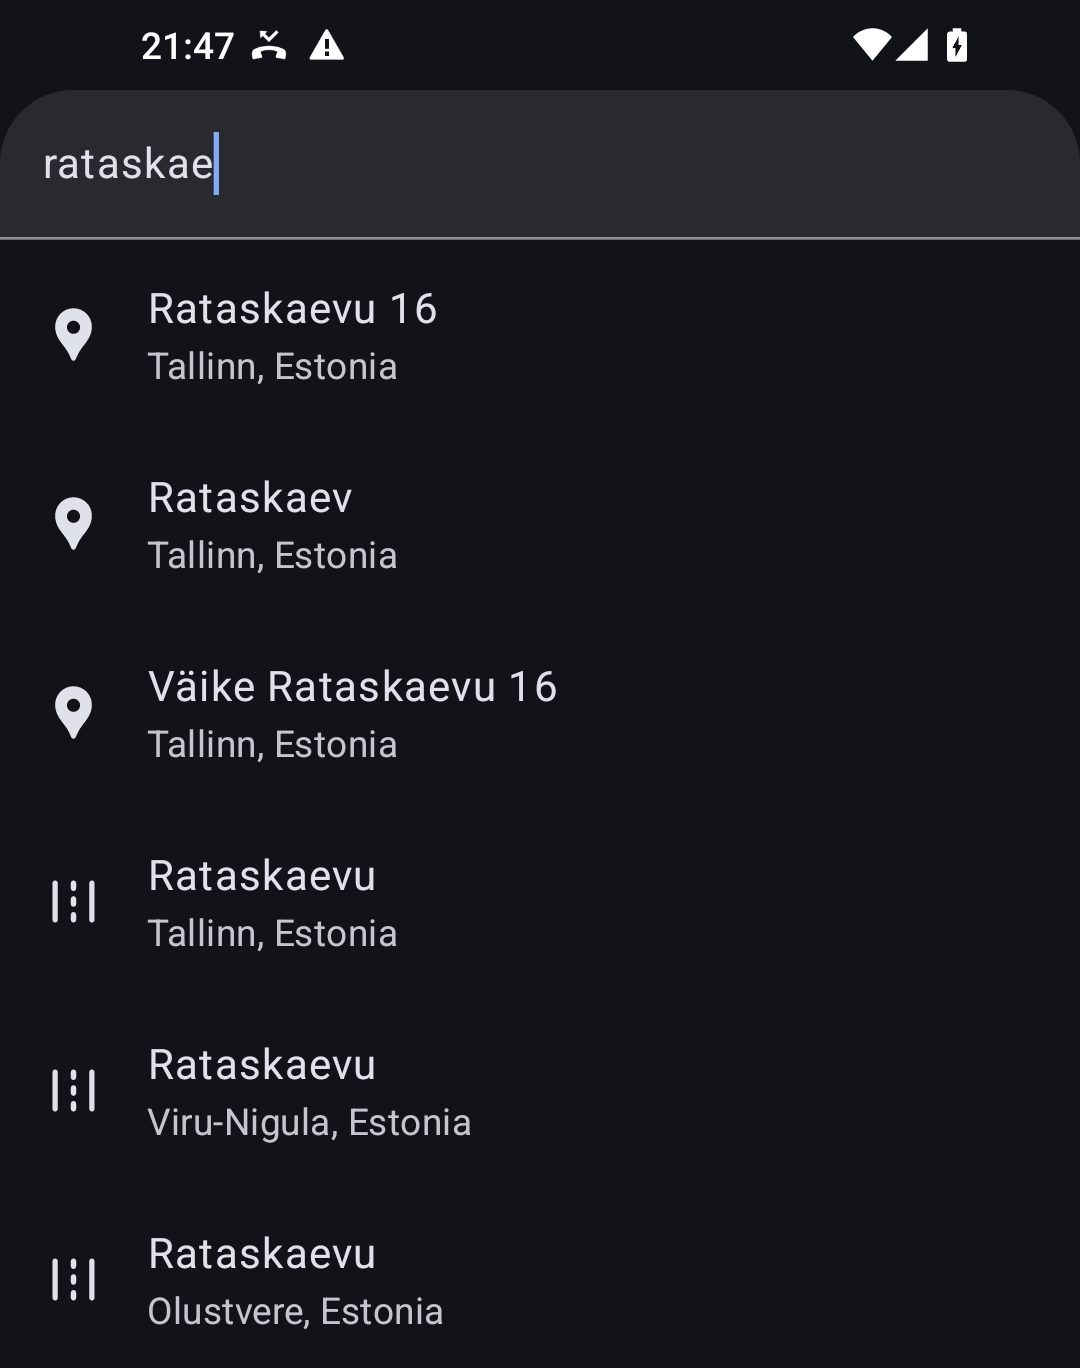
Add an autocomplete view to your Android app with just a few lines of code. Our composable takes care of the API calls so you can focus on building your app.
- Interactive - React when the user taps a result.
- Contextual - Focus the search near a location, providing the most relevant results first.
- Localized - Place names are translated automatically based on the device locale (where available).
- Customizable - Use any Composable view for complete control over the look and feel of the results.
Quickstart
Adding the Stadia Maps Autocomplete Search package from Maven Central is easy. Just add it to your Gradle build script like this:
dependencies {
    implementation("com.stadiamaps:jetpack-compose-autocomplete:3.0.0")
}
dependencies {
    // API package
    implementation 'com.stadiamaps:jetpack-compose-autocomplete:3.0.0'
}
You can find examples for more build systems on Maven Central.
Jetpack Compose Versions
NOTE: This project uses the new Search composable from Material 3 (M3). These are currently marked as experimental upstream and have been for several years. We use these anyways because the user experience is significantly better than hand-rolled alternatives.
JetPack Compose libraries need to be fairly closely matched, even when using stable APIs,
and this is even more important when using experimental ones.
If you experience a crash at runtime when using our AutocompleteSearch composable,
the first thing to check is your Jetpack Compose version.
We strongly recommend using the monthly BOMs.
Refer to libs.versions.toml
to see what we're currently using.
Getting an API Key
Next, you'll need to generate an API key to be able to make requests.
Tip
Autocomplete search is available on our free tier! Our paid tiers also have the ability to search deeper for addresses where we can't find the exact house number. The view is configured to try doing this when you press the search button, but will gracefully fall back if you don't have access.
New accounts get a free 14-day trial of this and all other paid features.
- Sign in to the client dashboard. (If you don't have an account yet, sign up for free; no credit card required!)
- Click "Manage Properties."
- If you have more than one property (ex: for several websites or apps), make sure you have selected the correct property from the dropdown at the top of the page.
- Under "Authentication Configuration," you can generate, view or revoke your API key.
Video: How to generate your API key
Using the Composable
Using the composable in your layout is easy! While the selection handler is technically optional, most apps probably want to do something, like search for routes, or push a detail view onto the navigation stack.
Experimental API annotation
Rather than hiding the use of experimental APIs, we make it explicit and propagate the usage upwarde.
You'll need to add @OptIn(ExperimentalMaterial3Api::class) above the composable function where you use
AutocompleteSearch.
AutocompleteSearch(
  // Replace with your API key
  apiKey = BuildConfig.stadiaApiKey,
  // Optional parameter to bias the location and show distances in results.
  // This snippet assumes that you have a location property in your view model or similar context.
  userLocation = lastLocation.value?.toAndroidLocation()) { feature ->
    // Do something with the selection.
    // For example, you might do something like this to start navigation
    // in an app using Ferrostar (https://docs.stadiamaps.com/sdks/ferrostar).
    // Fetch a route in the background
    feature.center()?.let { center ->
      // Fetch a route in the background
      scope.launch(Dispatchers.IO) {
        // NOTE: You probably want some graceful failure logic
        val routes =
          AppModule.ferrostarCore.getRoutes(
            loc,
            listOf(
              Waypoint(
                coordinate = GeographicCoordinate(center.latitude, center.longitude),
                kind = WaypointKind.BREAK
              ),
            )
          )

        // You could present options to the user here as well.
        val route = routes.first()
        // Set your view model to start navigating!
        // See the Ferrostar demo apps for a full example.
        viewModel = AppModule.ferrostarCore.startNavigation(route = route)
      }
    }
}
Customizing the result views
Don't like the built-in search result view? You can replace the list items with your own composable!
AutocompleteSearch(
  modifier = Modifier.padding(innerPadding),
  apiKey = apiKey,
  resultView = { feature, modifier ->
    // NB: Be sure to set the modifier! If you forget this, you won't have a click handler!
    Row(modifier = modifier) {
      Text("📍 ${feature.properties?.name ?: "<No Name>"}")
    }
  }
) {
  // TODO: Your selection logic here
}
Source Code
This plugin is completely open source! You can find the source code on GitHub.