Add Interactive Marker Pins to your Maps with MapLibre SwiftUI
Free
Starter
Standard
Professional
Once you have a map in your app, the next thing you probably want is a way to show your data. The most common overlay is a marker (also known as a pin), which highlights a point and (usually) does something when you tap on it.
This tutorial will show you how to add interactive markers to a map using MapLibre Native in SwiftUI. We'll start with the basics, and work all the way up to advanced styling and even grouping nearby markers to keep the map clean.
Before we get started, you'll need a Stadia Maps API key. You can sign up for free, and no credit card is required! After signing up, create a property and create an API key.
Get Started With a Free Account
In case you aren't already using the MapLibre SwiftUI DSL in your app, the quick start below will get you ready for this tutorial with your first map-based view.
Quick start: your first map
Te get started with the MapLibre SwiftUI DSL, you need to
add the Swift Package dependency to your project.
The repository URL is https://github.com/maplibre/swiftui-dsl.
This tutorial doesn't need much more than the package available and a simple view. This is enough to get started:
import MapLibre
import MapLibreSwiftUI
import MapLibreSwiftDSL
import SwiftUI

public struct MyView {
    // Your API key (click the big button above to create one)
    let apiKey = "YOUR-API-KEY"

    // You can find other styles in our library (https://docs.stadiamaps.com/themes/) or
    // provide your own.
    let styleID = "outdoors"

    // Build the style URL
    let styleURL = URL(string: "https://tiles.stadiamaps.com/styles/\(styleID).json?api_key=\(apiKey)")

    public var body: some View {
        MapView(styleURL: styleURL) {
            // We'll fill this part in during the rest of the tutorial!
        }
        .ignoresSafeArea(.all)
    }
}
Now, on with the tutorial!
Prepare your Data
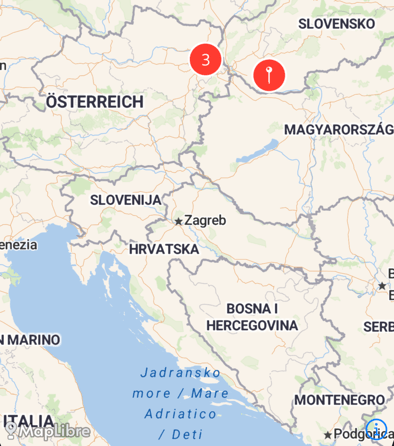
The first thing we'll need is some location data! In MapLibre, every layer needs to have a source with the data backing it. We can create one from a set of known locations like this:
let pointSource = ShapeSource(identifier: "points") {
    MLNPointFeature(coordinate: CLLocationCoordinate2D(latitude: 48.2082, longitude: 16.3719))
    MLNPointFeature(coordinate: CLLocationCoordinate2D(latitude: 48.3082, longitude: 16.3719))
    MLNPointFeature(coordinate: CLLocationCoordinate2D(latitude: 48.2082, longitude: 16.9719))
    MLNPointFeature(coordinate: CLLocationCoordinate2D(latitude: 48.0082, longitude: 17.9719))
}
This leverages the MapLibre Swift DSL
to create a data source with four points.
Just like the SwiftUI "result builders" you use to write views in your app,
you don't need to return a value from the ShapeSource builder.
Each point feature gets added to the final result automatically.
The ShapeSource result builder can also work with loops, if statements, and other flow control.
For example, you can load data from your API or other data source over the network,
and then loop over it to create a ShapeSource dynamically.
Add a marker layer
Next, let's display the data on a map by adding a layer. We'll make some simple circular layers using the same kind of approach we'd use in a Swift UI view. We're working with MapLibre layers instead of SwiftUI views, but the pattern is the same.
// Add a map view to your existing SwiftUI view.
MapView(styleURL: styleURL) {
    // First, we add a circle layer on top of everything else.
    CircleStyleLayer(identifier: "simple-circles", source: pointSource)
        .radius(16)
        .color(.systemRed)
        .strokeWidth(2)
        .strokeColor(.white)

    // Then, add a symbol layer on top
    SymbolStyleLayer(identifier: "simple-symbols", source: pointSource)
        .iconImage(UIImage(systemName: "mappin")!.withRenderingMode(.alwaysTemplate))
        .iconColor(.white)
}
// If your map takes up the whole view, you may want this modifier too...
.ignoresSafeArea(.all)
Within our MapView's builder closure, we add two layers to create the circular button:
one for the background, and another for the icon.
Both layers reference the source we defined earlier, which controls where the features get drawn.
Just as with SwiftUI views, we use modifiers to configure the appearance of the layers. For the circle layer, we customize how it's drawn, including its color and size (the center point comes from the shape source). The symbol style layer renders the icon, which we load by name from SF Symbols.
Using SF Symbols to Speed up Development
SF Symbols icons are a great way to speed up your app development process. Apple designed thousands of icons, and they're available for you out of the box. They won't increase your app size, as they are already bundled with the operating system. Many symbols even have localized variants, which can make your app more accessible with minimal effort!
Make your layers interactive
Now that we have the markers on the map, let's make them interactive!
MapView(styleURL: styleURL) {
    // Add your layers...
}
.onTapMapGesture(on: ["simple-circles"], onTapChanged: { _, features in
    // This prints to the console
    print("Tapped on \(features.first?.description ?? "<nil>")")
})
// Any other map view modifiers...
Interactivity is also controlled with view modifiers,
and the MapLibre SwiftUI DSL includes several specialized that are specialized for use with maps.
The onTapMapGesture modifier is the most common,
and it sets up a handler that fires on when a tap occurs within a specific set of layers.
You could technically get events for every layer in the map,
but you probably don't want to.
Our simple handler just prints the description of the first feature (if any) to the console. But you can do anything you like here, including updating your SwiftUI state, displaying a modal dialog, or transitioning to a detail view.
Avoid copying and pasting layer IDs
Copying string IDs around your codebase is a great way to accidentally break things! To keep the snippets short and readable, we've copied string IDs, but recommend you structure your appp with well-known string constants or some similar technique.
Style the markers dynamically
What if you have multiple types of markers? For example, you may want to make restaurants use a different icon than an EV charging station. We can do this with dynamic styling, which changes the look and feel based on the source data's attributes.
In the SwiftUI DSL, MLNPointFeature accepts an optional builder.
You can use this to arbitrary attributes on the feature
and reference them in your gesture handlers and styling.
As an example, let's assume you have an API that returns points of interest
with coordinates, an icon, and a heading from the user's current position.
You can construct your features with code like this,
which converts everything into point features with attributes for icon and heading.
    // Put this inside your `pointSource` definition
    for record in apiResponse {
        MLNPointFeature(coordinate: CLLocationCoordinate2D(latitude: record.lat, longitude: record.lon)) { feature in
            feature.attributes["icon"] = record.icon
            feature.attributes["heading"] = record.heading
        }
    }
When creating the symbol layer, you can usse modifiers to style each marker based on its attributes.
    SymbolStyleLayer(identifier: "dynamic-icon-symbols", source: pointSource)
        .iconImage(featurePropertyNamed: "icon",
                   mappings: [
                       "missing": UIImage(systemName: "mappin.slash")!,
                   ],
                   default: UIImage(systemName: "mappin")!)
        .iconRotation(featurePropertyNamed: "heading")
        .iconColor(.red)
The iconImage(featurePropertyNamed:mappings:default) modifier
sets the icon image dynamically based on a feature property (which we set earlier).
We can define the mappings dynamically using any image, including SF Symbols and app resources.
And iconRotation(featurePropertyNamed:) lets you dynamically control rotation.
Group markers into clusters
When your map grows to hundreds or even thousands of markers, it's usually not practical to display them all. We can keep our map visually clean and performant by clustering nearby points together.
We need to enable clustering at the ShapeSource level first.
Clustering happens based on pixel distance.
This lets us see the individual points when we are zoomed in on a cluster, or when there are no other points nearby.
let clustered = ShapeSource(identifier: "points", options: [.clustered: true, .clusterRadius: 44]) {
    // Add as many points as you like!
}
We also need to set up our layers a bit differently. When configuring a source with clustering, we'll actually get two types of features: clusters and the regular points. Here's a layer setup that will show a number indicating the cluster size when a feature is a cluster. Individual features are still represented with an icon.
        // Cluster == YES shows only those pins that are clustered, using .text
        CircleStyleLayer(identifier: "simple-circles-clusters", source: clustered)
            .radius(16)
            .color(.systemRed)
            .strokeWidth(2)
            .strokeColor(.white)
            .predicate(NSPredicate(format: "cluster == YES"))

        SymbolStyleLayer(identifier: "simple-symbols-clusters", source: clustered)
            .textColor(.white)
            .text(expression: NSExpression(format: "CAST(point_count, 'NSString')"))
            .predicate(NSPredicate(format: "cluster == YES"))

        // Cluster != YES shows only those pins that are not clustered, using an icon
        CircleStyleLayer(identifier: "simple-circles-non-clusters", source: clustered)
            .radius(16)
            .color(.systemRed)
            .strokeWidth(2)
            .strokeColor(.white)
            .predicate(NSPredicate(format: "cluster != YES"))

        SymbolStyleLayer(identifier: "simple-symbols-non-clusters", source: clustered)
            .iconImage(UIImage(systemName: "mappin")!.withRenderingMode(.alwaysTemplate))
            .iconColor(.white)
            .predicate(NSPredicate(format: "cluster != YES"))
Finally, let's revisit our tap gesture handling. Previously, we only had to deal with one type of tap, but now we need to differentiate between tapping on a cluster and a single feature.
The onTapMapGesture modifier looks about the same as before,
but note that we are specifically using the non-clustered layer!
To handle tapping on the clusters, we'll use a new modifier: expandClustersOnTapping.
This convenience modifier will zoom to a point at which the cluster expands.
    .onTapMapGesture(on: ["simple-circles-non-clusters"], onTapChanged: { _, features in
        print("Tapped on \(features.first?.debugDescription ?? "<nil>")")
    })
    .expandClustersOnTapping(clusteredLayers: [ClusterLayer(
        layerIdentifier: "simple-circles-clusters",
        sourceIdentifier: "points")])
Next steps
The SwiftUI DSL has a directory full of examples on GitHub, showing the full range of what's possible. It even includes several variations on the examples in this tutorial. You can also check out the latest documentation on the Swift Package Index.
And, in case you've just been reading along but haven't tried it out yet, be sure to grab an API key!