Getting Started with MapLibre React Components
Free
Starter
Standard
Professional
Adding maps to your React-based web app has never been easier. React Leaflet is a solid choice, particularly when you need advanced functionality like marker clustering. But if you want something lean, optimized for vector tiles, and designed exclusively for MapLibre (like the globe view!), MapLibre React Components are worth a look.
This tutorial will walk you through setting up a basic map, adding markers, and a dismissable popup.
Create a React Application
If you don't have an existing React application, starting one is straightforward with npm create.
npm create vite@latest my-app
Follow the prompts, selecting "React" as the framework, and your language of preference (we recommend TypeScript, but JavaScript works alright too).
Default CSS
The template projects come with a lot of default CSS.
We completely ignore App.css,
and replace index.css with the following minimal code:
:root {
  font-family: Inter, system-ui, Avenir, Helvetica, Arial, sans-serif;
}

html,
body,
#root {
  margin: 0;
  width: 100%;
  height: 100%;
  background-color: #222;
}
Install Dependencies
The core of our map integration will rely on MapLibre React Components.
Install it using npm or your preferred package manager.
You'll also need maplibre-gl.
npm install maplibre-gl maplibre-react-components
Set Up Your Map
Before adding the map to your component,
we need to import the MapLibre stylesheet.
We'll import this directly from the maplibre-gl package.
import "maplibre-gl/dist/maplibre-gl.css";
Next, we'll need the RMap component.
import { RMap } from 'maplibre-react-components';
````

Now we're ready to add a map.
Find the area where you'd like it to appear in your React component.
Then, add the `RMap` component like so:

```jsx
<RMap
   mapStyle="https://tiles.stadiamaps.com/styles/alidade_smooth_dark.json"
   // Initial viewport; NOTE: coordinates are in longitude, latitude order,
   // NOT latitude, longitude as is commonly written!
   initialCenter={[24.750592, 59.44435]}
   initialZoom={15}
/>
You can even configure binding to React state, and the map will update automatically!
Add a Marker
To provide more context to your users, you can add markers to your map.
For example, you may have a set of nearby hotels,
sights to see along a tour route, or favorite locations saved by the user.
MapLibre React Components includes the RMarker component which makes this easy.
Here's how you'd add a marker to the map.
Note that the RMarkers should be added as children of the RMap!
<RMap
   mapStyle="https://tiles.stadiamaps.com/styles/alidade_smooth_dark.json"
   // Initial viewport; NOTE: coordinates are in longitude, latitude order,
   // NOT latitude, longitude as is commonly written!
   initialCenter={[24.750592, 59.44435]}
   initialZoom={15}
>
  <RMarker longitude={24.750592} latitude={59.44435} />
</RMap>
Making the Marker Interactive
You can make the marker interactive using events like onClick, onDragStart, and onDragEnd.
One popular use is making a popup appear with some extra details.
We can use React state and the RPopup component provided by MapLibre React Components
to add a popup like this:
<RPopup
longitude={24.750592}
latitude={59.44435}
offset={markerPopupOffset}
>
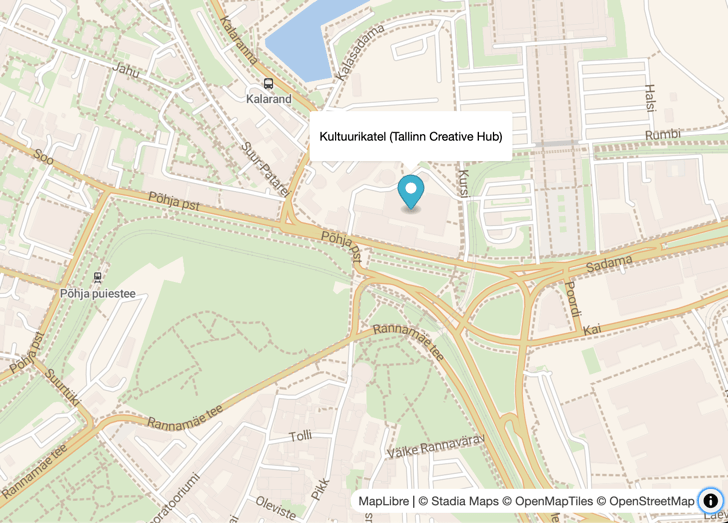
Kultuurikatel (Tallinn Creative Hub)
</RPopup>
The markerPopupOffset utility (also provided by maplibre-react-components)
automatically sets the offset for the popup,
so that it appears relative to the marker.
Bringing it all Together
Let's bring it all together now with a bit of React state so that we incorporate the click events. We'll make the popup visible by default, dismiss it when clicking anywhere else on the map (usually this means the user wants to dismiss it), and toggle visibity when clicking the marker. (You can also mentally replace "click" with "tap" by the way; this works on mobile too!).
import 'maplibre-gl/dist/maplibre-gl.css';

import {
    markerPopupOffset,
    RMap,
    RMarker,
    RPopup
} from 'maplibre-react-components';
import type {LngLatLike} from 'maplibre-gl';
import {useState} from 'react';

function App() {
    // NOTE: coordinates are in longitude, latitude order,
    // NOT latitude, longitude as is commonly written!
    const kultuuriKatel: LngLatLike = [24.750592, 59.44435];
    const [showPopup, setShowPopup] = useState(true);

    return (
        <RMap
            mapStyle='https://tiles.stadiamaps.com/styles/outdoors.json'
            initialCenter={kultuuriKatel}
            initialZoom={15}
            onClick={() => {
                // Hide the popup when clicking on the map
                setShowPopup(() => false);
            }}
            // BONUS: Use the new globe projection; zoom out for the effect
            onLoad={(e) => e.target.setProjection({type: 'globe'})}
        >
            <RMarker
                longitude={kultuuriKatel[0]}
                latitude={kultuuriKatel[1]}
                onClick={(e) => {
                    e.stopPropagation();
                    // Toggle popup visibility when clicking on the marker
                    setShowPopup((s) => !s);
                }}/>
            {showPopup && (
                <RPopup
                    longitude={kultuuriKatel[0]}
                    latitude={kultuuriKatel[1]}
                    offset={markerPopupOffset}
                >
                    Kultuurikatel (Tallinn Creative Hub)
                </RPopup>
            )}
        </RMap>
    )
}

export default App
Next Steps
MapLibre React Components can do a lot more! Refer to the official documentation.
Once you're ready to deploy your app, sign up for a free Stadia Maps account, and we'll walk through the next steps to get your domain authenticated.