Getting started with GEOlayers 3 by adding a Stadia Maps style source
Free
Starter
Standard
Professional
Note
Please review our FAQ for guidelines when using Stadia Maps in your video projects.
GEOlayers is a plugin that lets you design and animate maps directly in Adobe After Effects.
You can quickly draw buildings to After Effects shape layers, highlight features (borders, streets, lakes, rivers, places, etc.),
animate driving routes, extrude buildings, and more!
All sorts of geospatial data, including other sources from Stadia Maps,
can be integrated as editable assets in After Effects, further extending the power of GEOlayers.
In this tutorial (with screenshots from the original GEOlayers 3 Vimeo guide), we'll
show you how to add the Stamen Toner style to your Mapcomp library.
We assume you are familiar with both Adobe After Effects and GEOlayers 3.
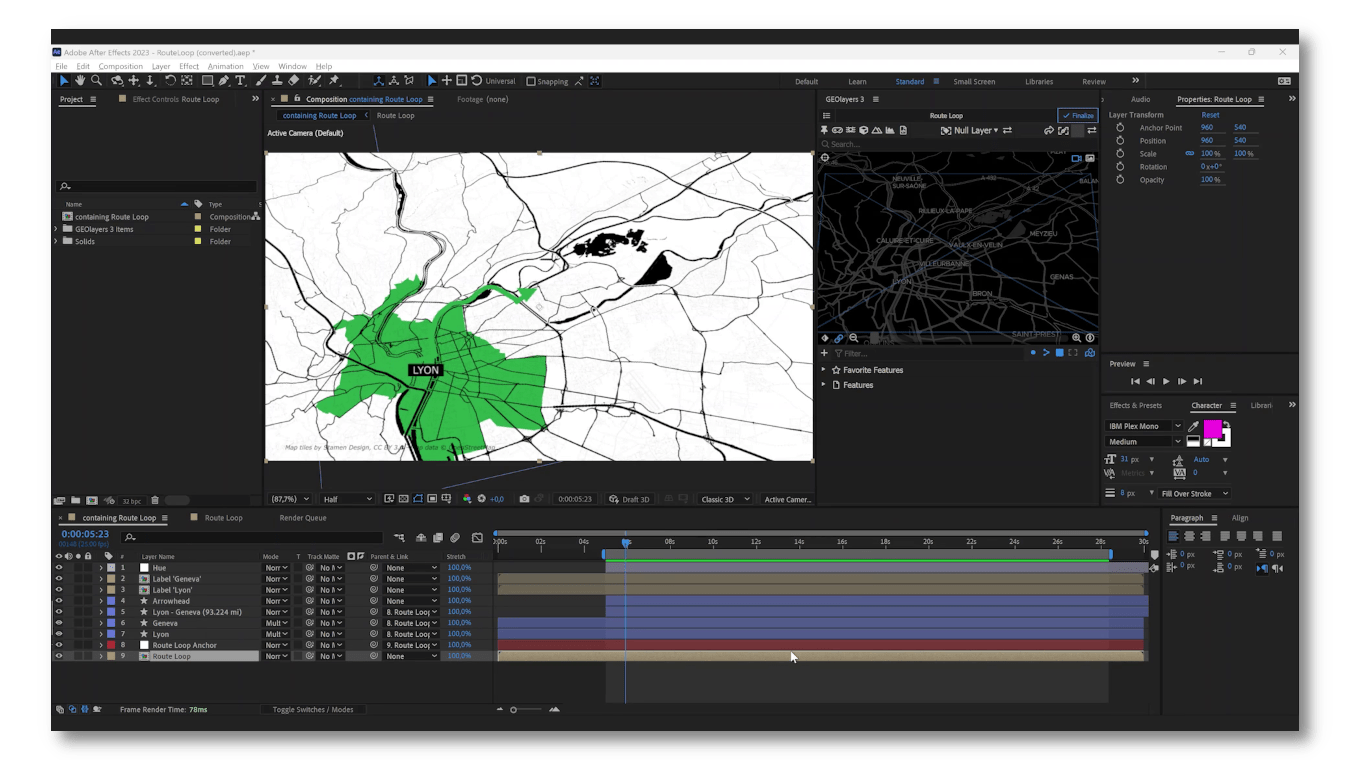
Set up API key authentication
You'll need a Stadia Maps API key to access the tiles in GEOlayers.
- Sign in to the client dashboard. (If you don't have an account yet, sign up for free; no credit card required!)
- Click "Manage Properties."
- If you have more than one property (ex: for several websites or apps), make sure you have selected the correct property from the dropdown at the top of the page.
- Under "Authentication Configuration," you can generate, view or revoke your API key.
Video: How to generate your API key
Once generated, replace YOUR-API-KEY in the code below with your key.
Be mindful with the management of your API keys.
Adding a new style
In After Effects, with the GEOlayers plugin panel open, select the settings for the Mapcomp that you would like to
update. If you don't have a Mapcomp added to your current project, simply create one.
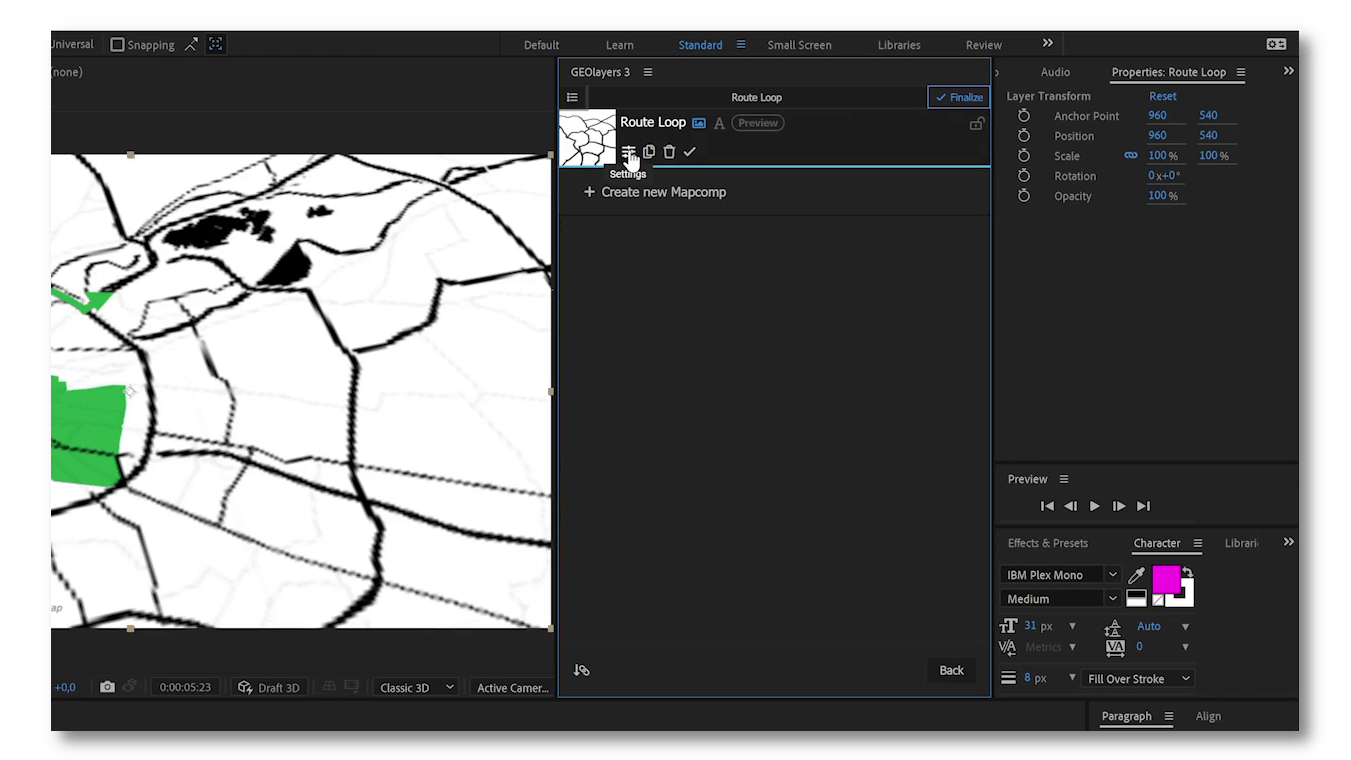
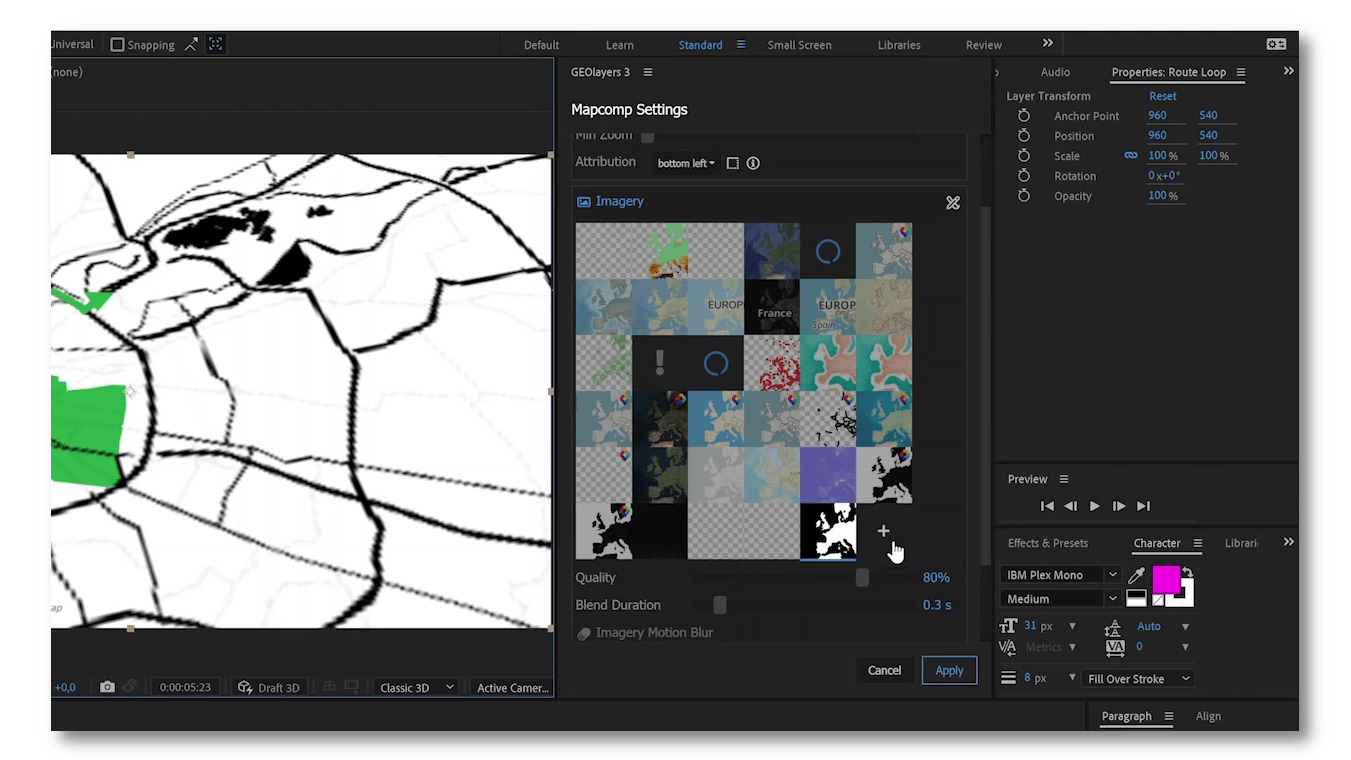
Next, you need to select the new Mapcomp Imagery option.
Here, we need to enter the raster source with the appropriate URL for the style we would like to use. You can find all available Stadia Maps styles in our docs. We will utilize the Stamen Toner style. It has the following raster tile URL:
https://tiles.stadiamaps.com/tiles/stamen_toner/{z}/{x}/{y}@2x.png
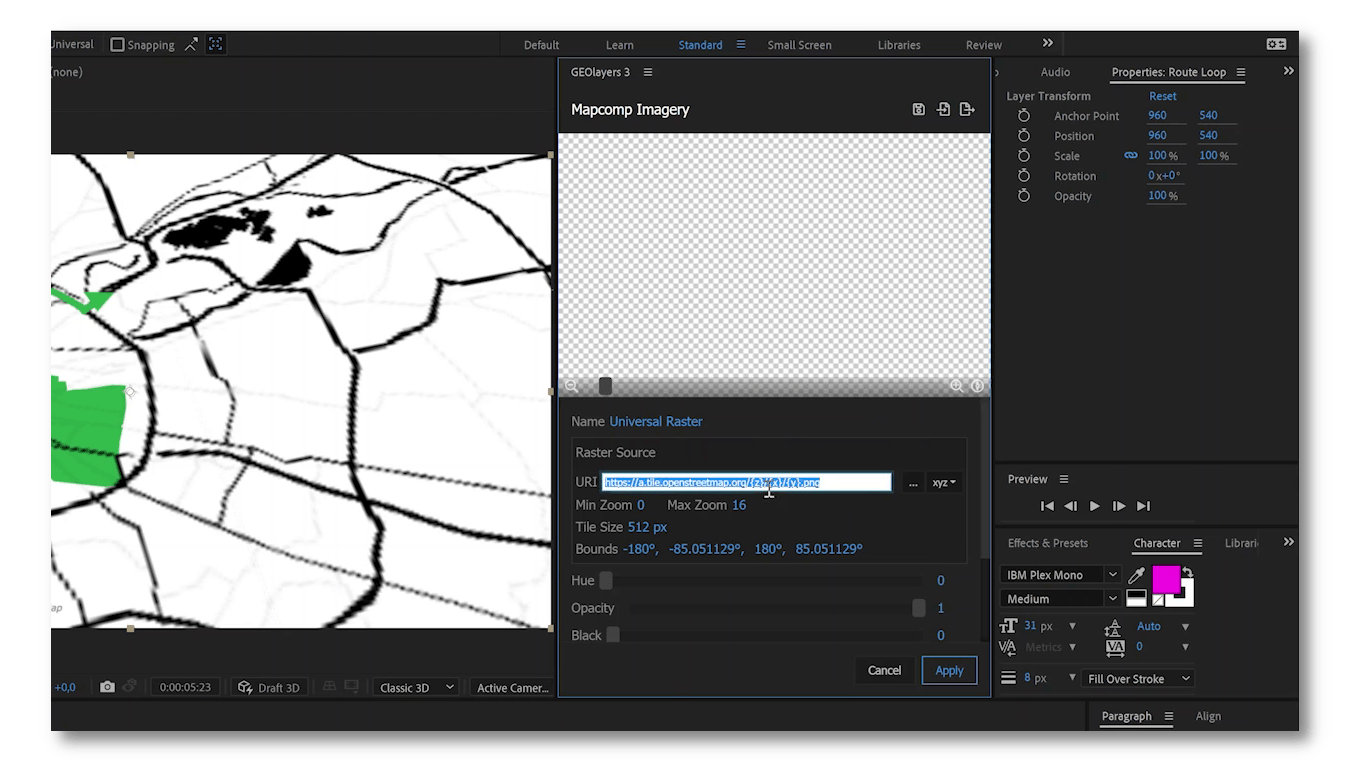
Now, to authenticate your request, append your API key to the URL by adding ?api_key=YOUR-API-KEY. Afterwards,
confirm your URL looks like this:
https://tiles.stadiamaps.com/tiles/stamen_toner/{z}/{x}/{y}@2x.png?api_key=YOUR-API-KEY
Update the name to something like Stadia Maps - Stamen Toner and then you can apply the new Mapcomp Imagery option
to save it in your style library.
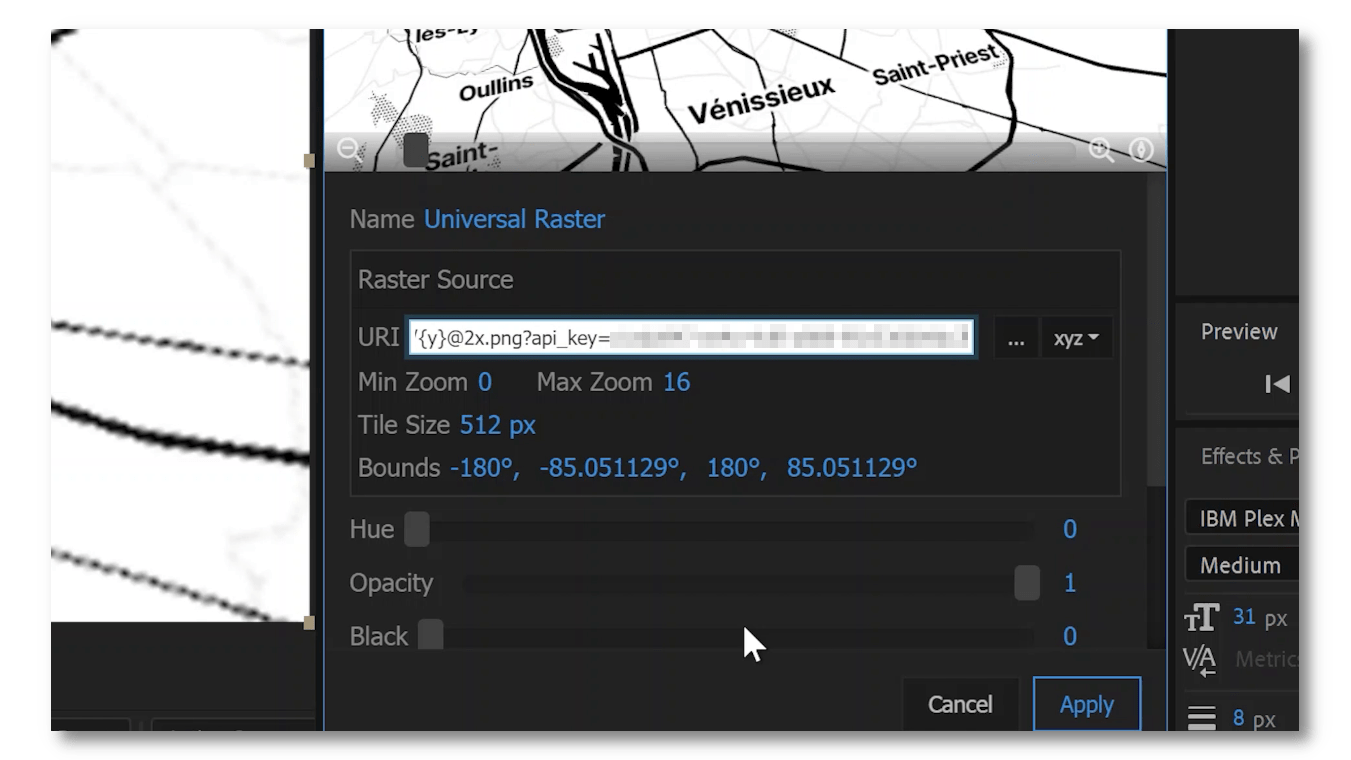
And finally, click apply again to update the selected Mapcomp to that style. GEOlayers should now re-render the
Mapcomp with the Stamen Toner style.
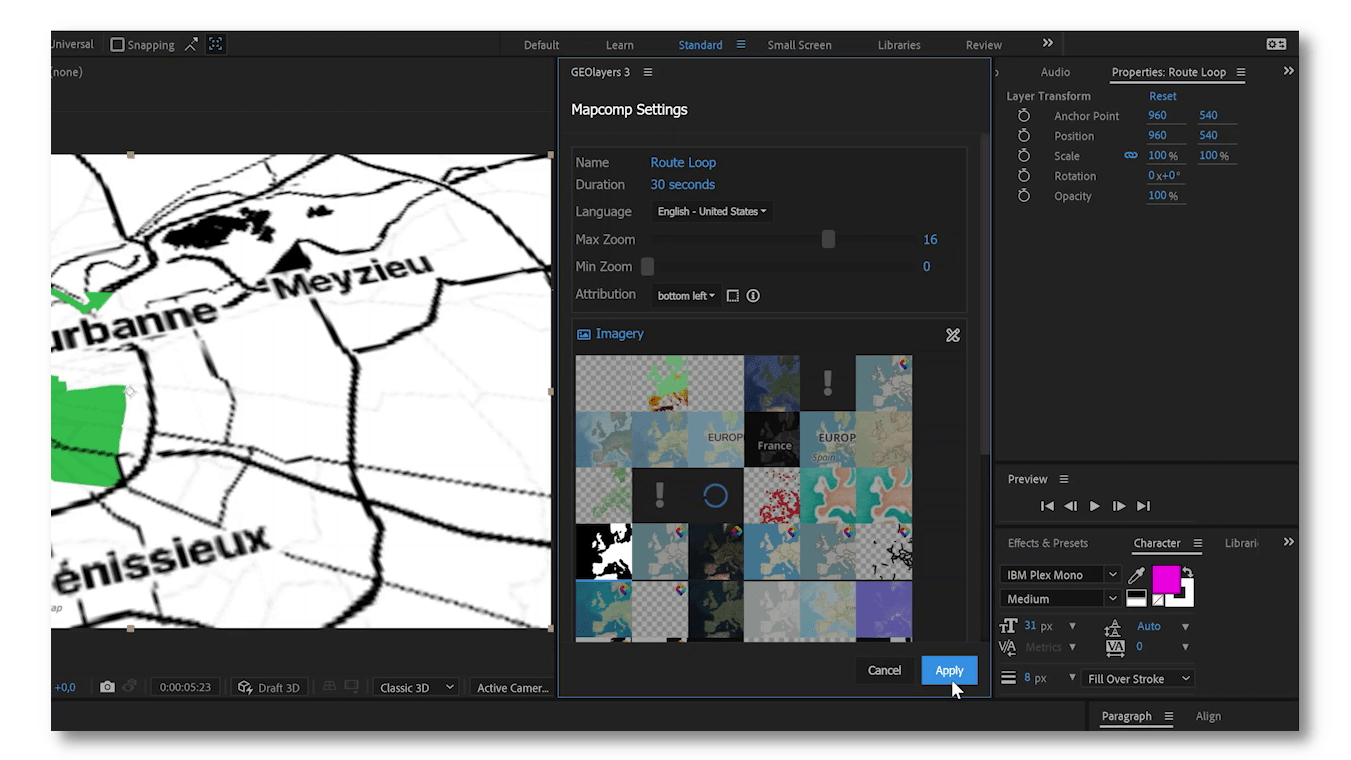
Going deeper
With Stamen Toner added, you can now include all of our style options by following the same process for each.
You can also learn more about GEOlayers with their extensive video tutorial collection on Vimeo, along with the latest details on their aescripts.com page.